|
|
||
|---|---|---|
| .. | ||
| azure_iotc_sample | ||
| images | ||
| .gitignore | ||
| IOTC.md | ||
| README.md | ||
README.md
Step by step - Azure IoT - Free RTOS verizon kit sample (b-l475e-iot01a1-bg96)
Setting up the dev environment and building the sample
-
Download
OpenSTM32 SystemWorkbenchfrom this URL You will need to register / login to access downloads. -
Clone this repository ->
git clone https://github.com/azure/iot-central-firmware -
Open
SystemWorkbenchon your desktop. -
Right click to empty white space on the
project explorertab. SelectImport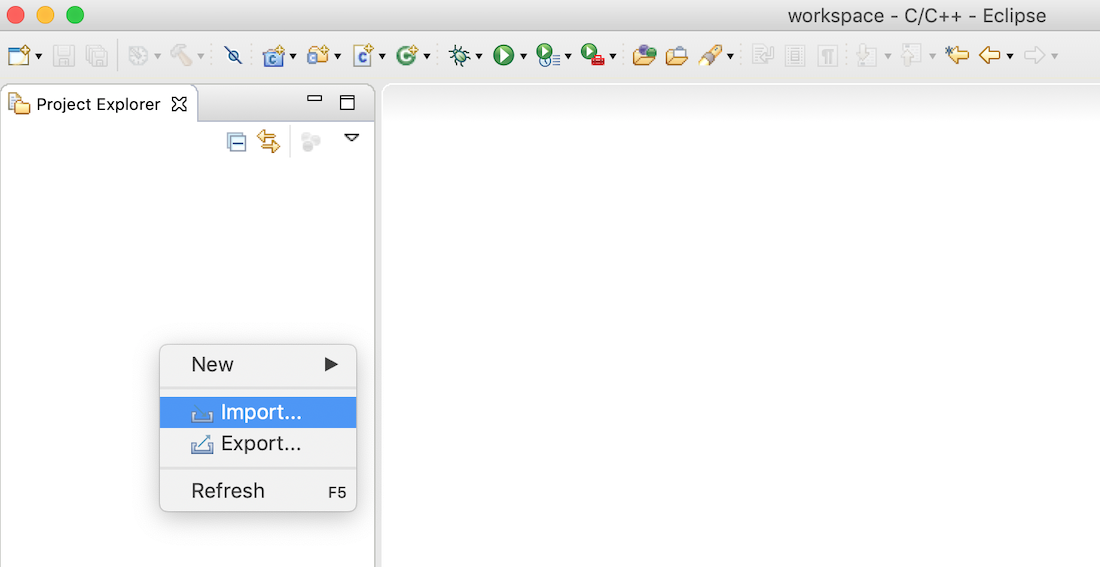
-
Select
Existing Projects into Workspaceand clickNext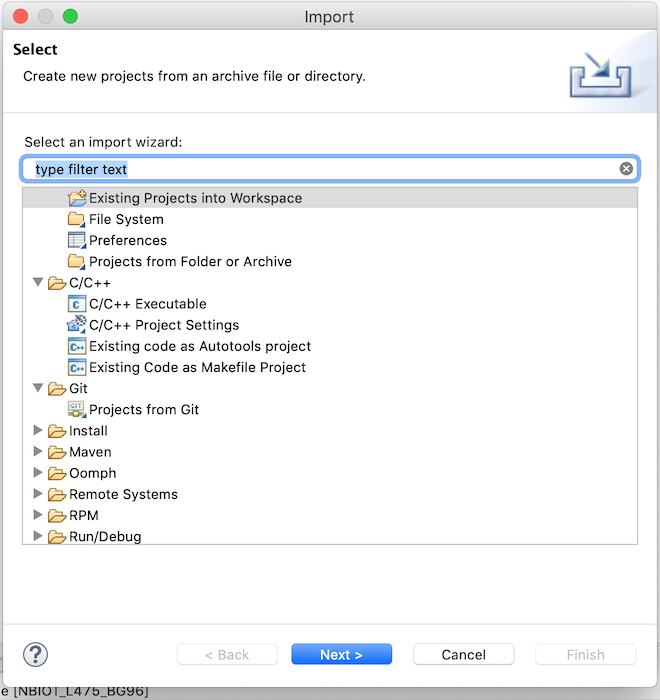
-
Browse into
iot-central-firmware/freeRTOS/b-l475e-iot01a1-bg96-verizon/azure_iotc_samplefolder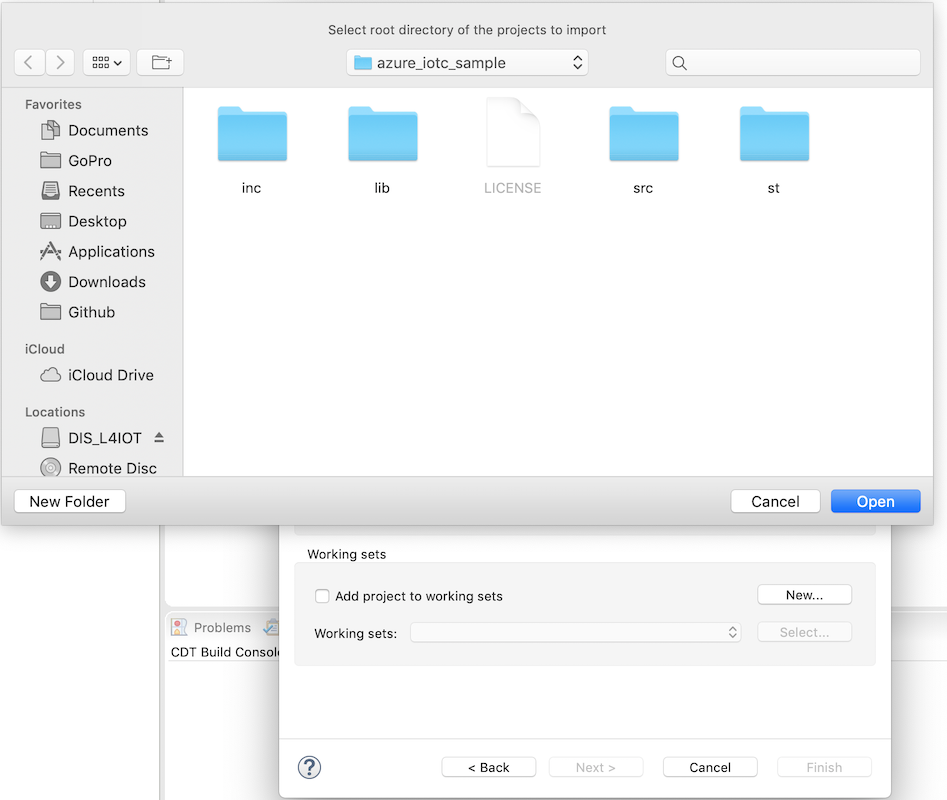
-
See
azure_iotc_samplefolder is selected as root directory and clickFinish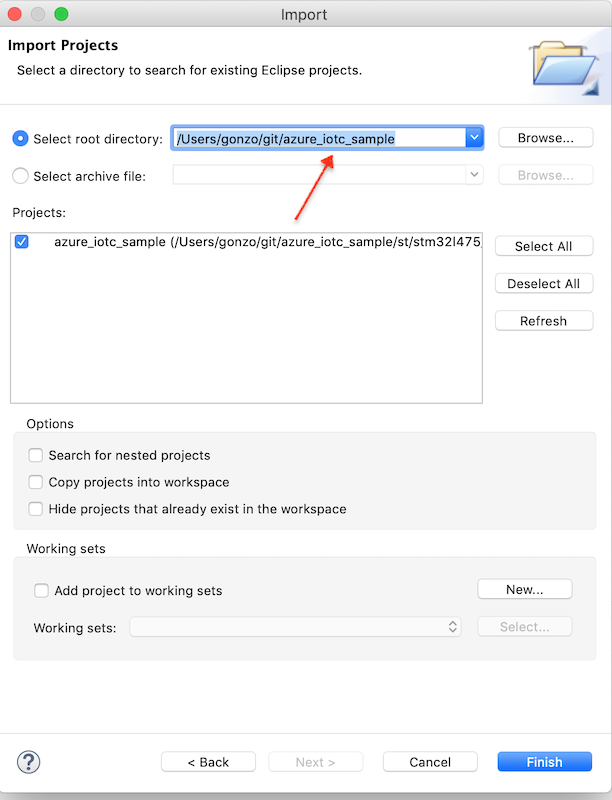
-
Visit AzureIoTCentral and create a
new application. -
Select
Sample Devkits -
Add a new
mxchipdevice. (a real device) (underDevice Explorer) -
Browse into device UI (by clicking to name of the device under
Device explorer) -
Click/open
Connectat top-right of the device UI -
Grab
scopeId,device Idandprimary key(DEVICE_KEY) and fill the necessary parts underiotc_sample.cppas shown on the screenshot below.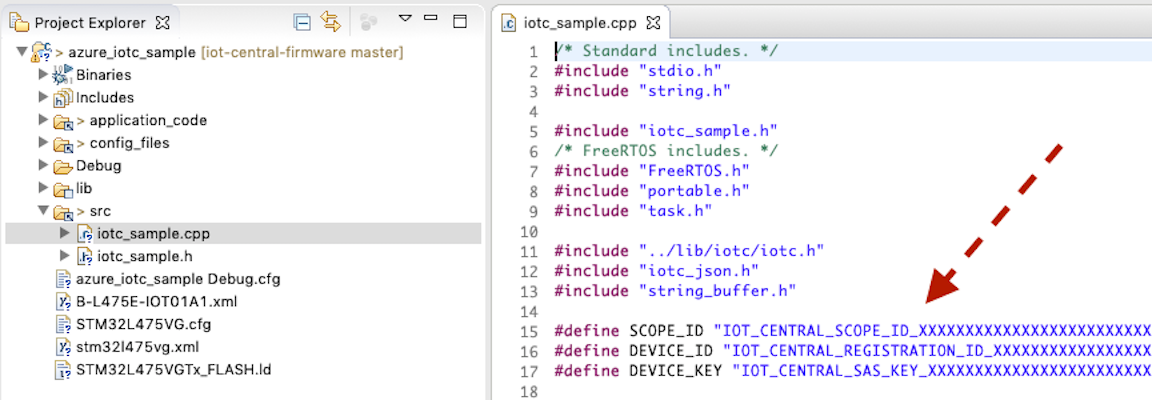
-
Right click to
azure_iotc_sampleproject name on theproject explorertab and click toBuild Project
-
If you see any error, again right click to
azure_iotc_samplebut this time select,Index>Rebuild.. and then Build the project as explained on the previous step. -
Finally, you will find the binary file (
azure_iotc_sample_debug.bin) underazure_iotc_sample/st/stm32l475_discovery/ac6/Debuglocation. (this location is relative to project folder you have cloned). -
Connect your board to your computer. If you are on Windows, you will need to install a driver from
https://www.st.com/en/development-tools/stsw-link009.html -
Drag and drop the
azure_iotc_sample_debug.binfile into board from the file explorer. You should see the board as an external usb drive.
Api and pinpoints
- This sample uses
iotcthin client api. See IOTC.md for more. src/iotc_sample.cppfile contains the application logic and authentication to azure iot.- Find
void iotc_main(void* pvParameters)underiotc_sample.cppto see- how to connect
- how to send telemetry and reported properties
onConnectionStatus/onSettingsUpdated/onCommand/onEvent.. are the callbacks for iotc client.
Device logs
-
in order to see the logs, you should look into serial terminal. i.e.
nodemcuis a practical cross platform tool you may try. Install =>npm install -g nodemcu-tool -
Find your board .. (on Windows, you should find the COM port, while on *nix, you should look into
/devfolder)
i.e. nodemcu-tool -p /dev/tty.usbmodem14103 -b 115200 terminal was working on my machine. Do not expect /dev/tty.usbmodem14103 to work on your machine. On Windows, it will be something like COMXXX. Look into Device explorer and see which USB COM port is used by ST driver. On *nix try tab key after /dev/tty. or /dev/usb. to see the available devices and select the right one.