|
…
|
||
|---|---|---|
| .. | ||
| content | ||
| imgs | ||
| .gitignore | ||
| DotnetIsolated-BidirectionChat.csproj | ||
| DotnetIsolated-BidirectionChat.sln | ||
| Functions.cs | ||
| Program.cs | ||
| README.md | ||
| host.json | ||
| local.settings.json | ||
README.md
Azure function bidirectional chatroom sample
This is a chatroom sample that demonstrates bidirectional message pushing between Azure SignalR Service and Azure Function in serverless scenario. It leverages the upstream provided by Azure SignalR Service that features proxying messages from client to upstream endpoints in serverless scenario. Azure Functions with SignalR trigger binding allows you to write code to receive and push messages in several languages, including JavaScript, Python, C#, etc.
Prerequisites
The following softwares are required to build this tutorial.
- .NET SDK (Version 6.0, required for Functions extensions)
- Azure Functions Core Tools (Version 4)
- Azure CLI
Run sample in Azure
It's a quick try of this sample. You will create an Azure SignalR Service and an Azure Function app to host sample. And you will launch chatroom locally but connecting to Azure SignalR Service and Azure Function.
Create Azure SignalR Service
-
Create Azure SignalR Service using
az cliresourceGroup=myResourceGroup signalrName=mySignalRName region=eastus # Create a resource group. az group create --name $resourceGroup --location $region az signalr create -n $signalrName -g $resourceGroup --service-mode Serverless --sku Standard_S1 # Get connection string for later use. connectionString=$(az signalr key list -n $signalrName -g $resourceGroup --query primaryConnectionString -o tsv)For more details about creating Azure SignalR Service, see the tutorial.
Deploy project to Azure Function
-
Deploy with Azure Functions Core Tools
-
Create Azure Function App (code snippet shown below)
#!/bin/bash # Function app and storage account names must be unique. storageName=mystorageaccount functionAppName=myserverlessfunc # Create an Azure storage account in the resource group. az storage account create \ --name $storageName \ --location $region \ --resource-group $resourceGroup \ --sku Standard_LRS # Create a serverless function app in the resource group. az functionapp create \ --name $functionAppName \ --storage-account $storageName \ --consumption-plan-location $region \ --resource-group $resourceGroup \ --functions-version 4 -
Publish the sample to the Azure Function you created before.
cd <root>/samples/DotnetIsolated-BidirectionChat
// If prompted function app version, use --force
func azure functionapp publish $functionAppName
-
Update application settings
az functionapp config appsettings set --resource-group $resourceGroup --name $functionAppName --setting AzureSignalRConnectionString=$connectionString -
Update Azure SignalR Service Upstream settings
Open the Azure Portal and nevigate to the Function App created before. Find
signalr_extensionkey in the App keys blade.Copy the
signalr_extensionsvalue and use Azure Portal to set the upstream setting.-
In the Upstream URL Pattern, fill in the
<function-url>/runtime/webhooks/signalr?code=<signalr_extension-key>[!NOTE] The
signalr_extensionscode is required by Azure Function but the trigger does not only use this code but also Azure SignalR Service connection string to validate requests. If you're very serious about the code, use KeyVault secret reference feature to save the code. See Use Key Vault secret reference.
-
Use a chat sample website to test end to end
-
Use browser to visit
<function-app-url>/api/indexfor the web page of the demo.
Use Key Vault secret reference
The url of upstream is not encryption at rest. If you have any sensitive information, you can use Key Vault to save these sensitive information. Basically, you can enable managed identity of Azure SignalR Service and then grant a read permission on a Key Vault instance and use Key Vault reference instead of plaintext in Upstream URL Pattern.
The following steps demonstrate how to use Key Vault secret reference to save signalr_extensions.
-
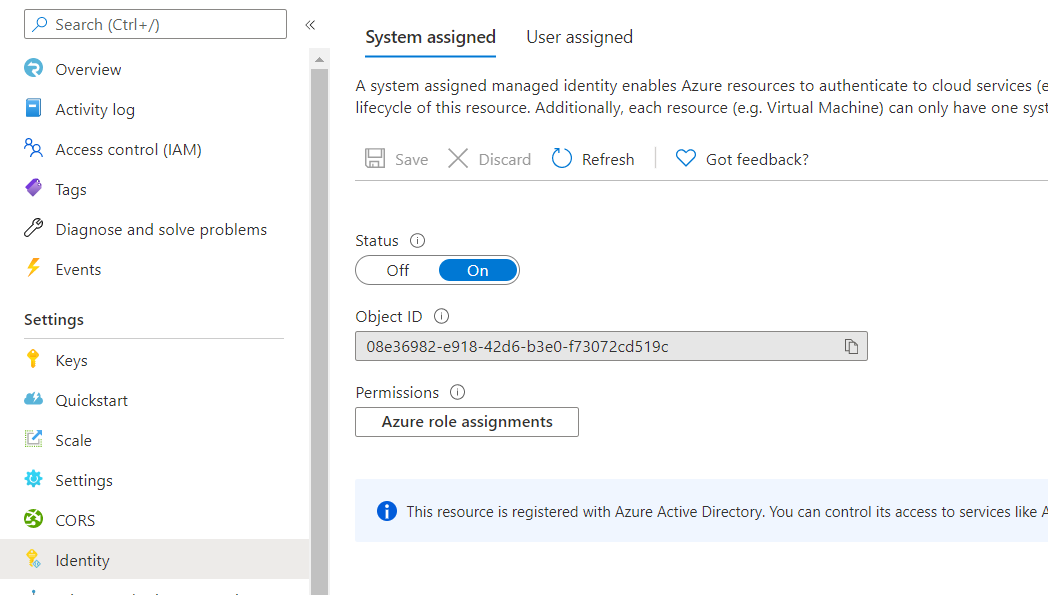
Enable managed identity.
-
Create a Key Vault instance.
az keyvault create --name "<your-unique-keyvault-name>" --resource-group "myResourceGroup" --location "EastUS" -
Save
signalr_extensionsto secret.az keyvault secret set --name "signalrkey" --vault-name "<your-unique-keyvault-name>" --value "<signalr_extension_code_copied_from_azure_function>" -
Grant Secret Read permission to the Key Vault.
az keyvault set-policy --name "<your-unique-keyvault-name>" --object-id "<object-id-shown-in-system-assigned-identity>" --secret-permissions get -
Get the secret identity of the secret.
az keyvault secret show --name "signalrkey" --vault-name "<your-unique-keyvault-name>" --query id -o tsv -
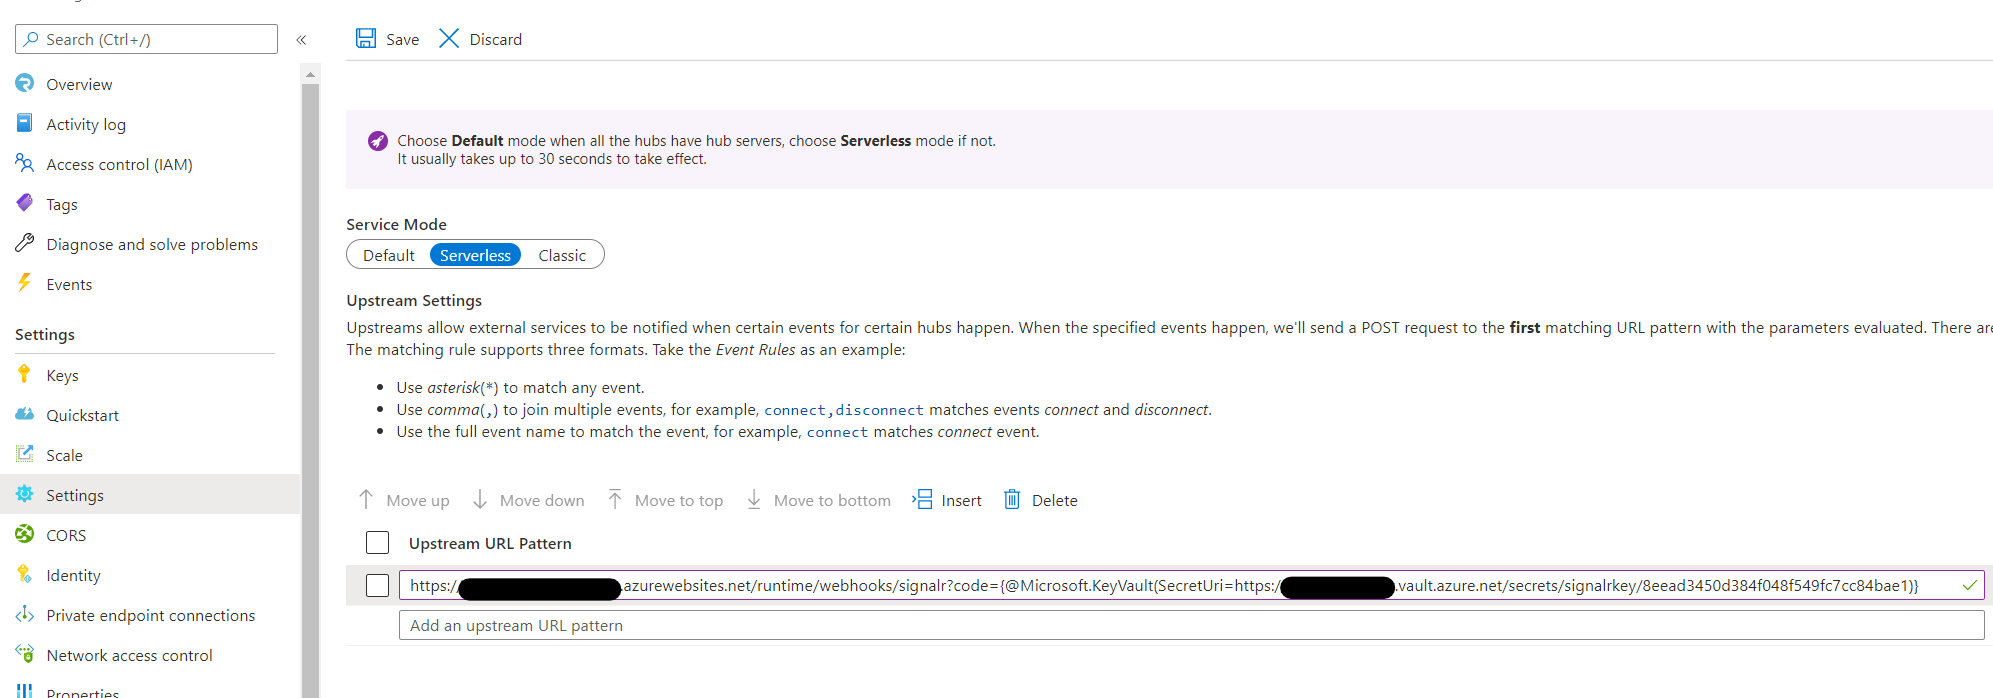
Update Upstream URL Pattern with Key Vault reference. You need to follow the syntax
{@Microsoft.KeyVault(SecretUri=<secret-identity>)}. As shown below:
Enable AAD Token on upstream
You can set ManagedIdentity as the Auth setting in upstream. After that, SignalR Service will set an AAD Token into the Authorization for each upstream request.
-
Make sure you have enabled managed identity.
-
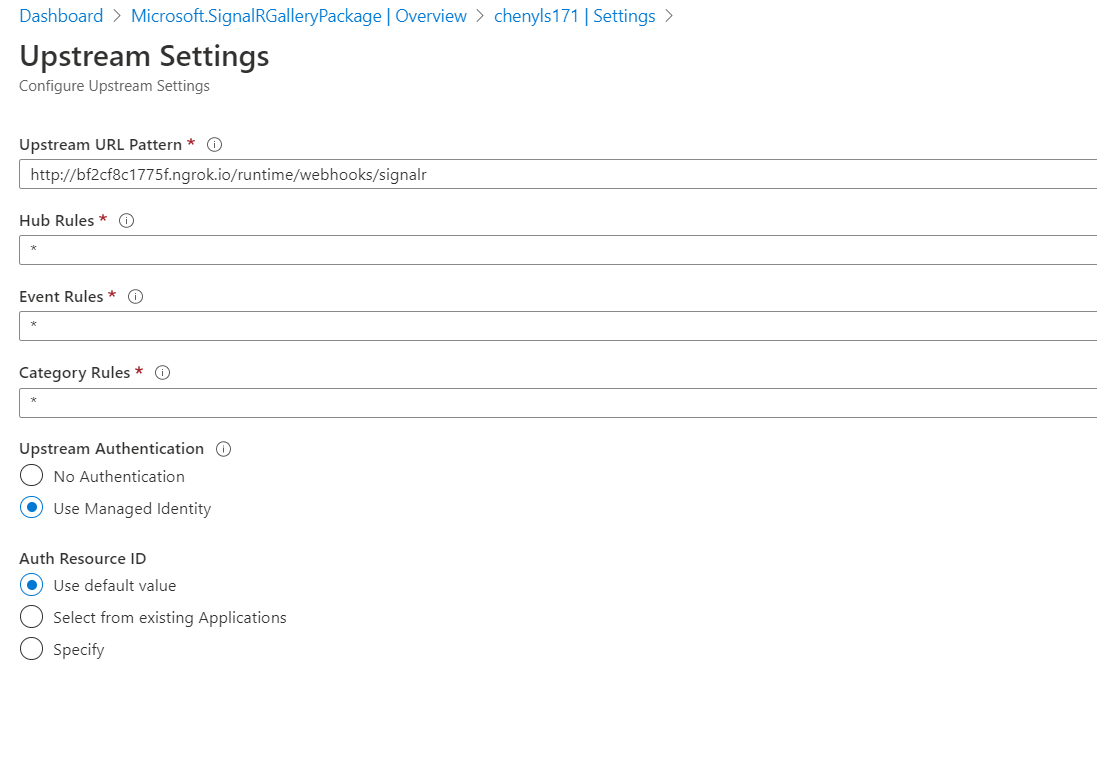
Click the asterisk in Hub Rules and a new page pops out as shown below.

-
Select Use Managed Identity under Upstream Authentication and Use default value under Auth Resource ID.
-
Use browser to visit
<function-app-url>/api/indexfor the web page of the demo -
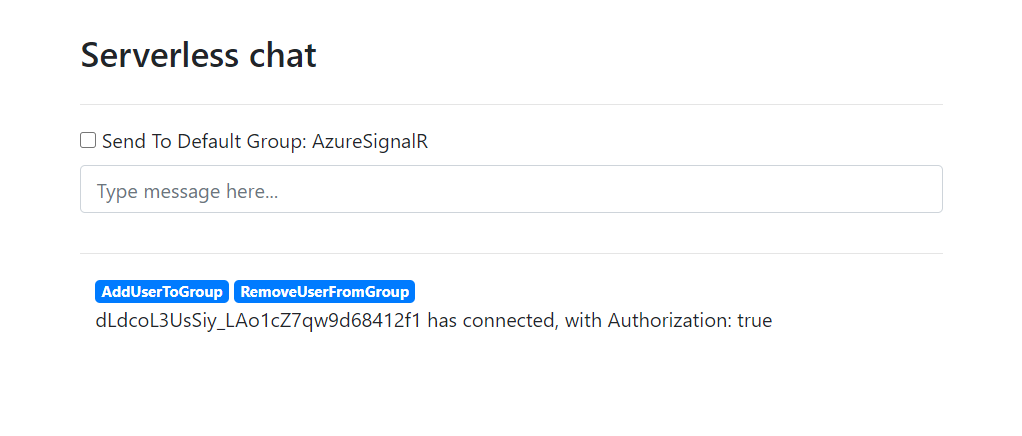
Try send messages by entering them into the main chat box. You can verify the
Authorizationhas set from thewith Authorization: true


