* chore: fix uppercase extensions on some images * chore: directory changes * chore: directory rename * chore: Service Principal secrets first adjustments * fix: adjustment of SP * chore: save secret on output * chore: syntax fix * chore: token adjustment * chore: store secret inside output hol file * chore: put SP inside parameters * chore: template adjustment * chore: lower parameter for fix * chore: syntax adjustment * chore: Add logs * chore: add log info * chore: log info * chore: pipeline execution change * chore: documentation adjustments |
||
|---|---|---|
| .. | ||
| configs | ||
| docs | ||
| schemas | ||
| scripts | ||
| .gitignore | ||
| README.md | ||
README.md
Setup the Hands-On Lab
Execute all these steps below to setup your evironment before running the Hands-On Lab.
Step 1: Azure DevOps Setup
-
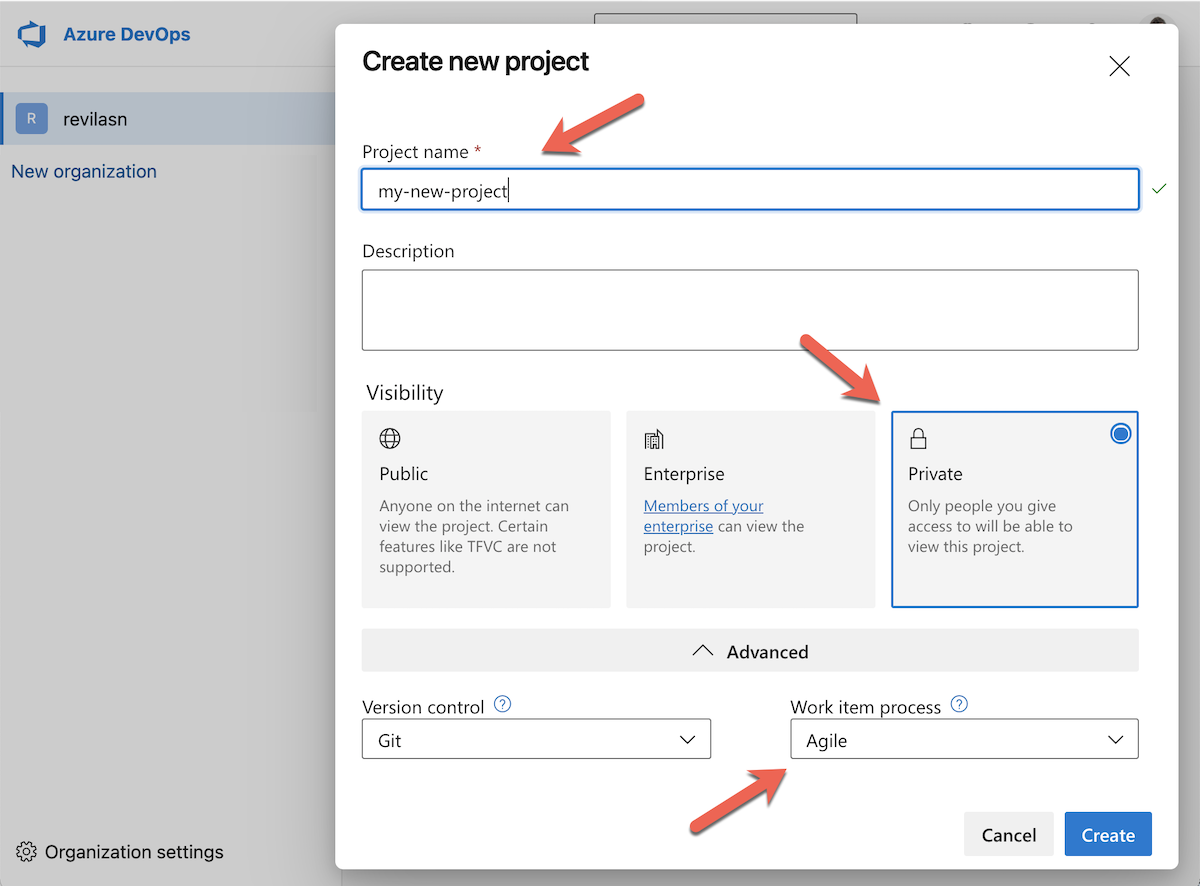
Create a new Azure Azure DevOps Project.
-
Visibility:
Private -
Work item process:
Agile
-
-
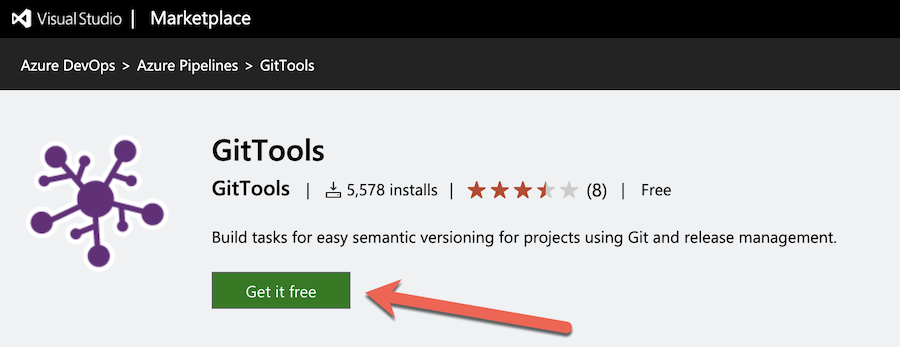
Install the GitTools extension in the Organization level of the new Azure DevOps project.
-
Authorize the project Build Service to be an Administrator of Variable Groups:
-
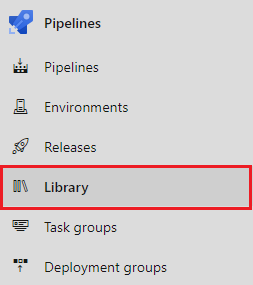
Select Library under Pipelines:
-
Click the Security button:
-
Make sure the Build Service has the Administrator role:
In case the Build Service user is not present on this list, click on
+ Addand search for<projectName> Build Service, assigning theAdministratorrole. If you aren't finding the<projectName> Build Service, start typing your project name on the search bar, and you should receive a suggestion for<projectName> Build Service.
-
-
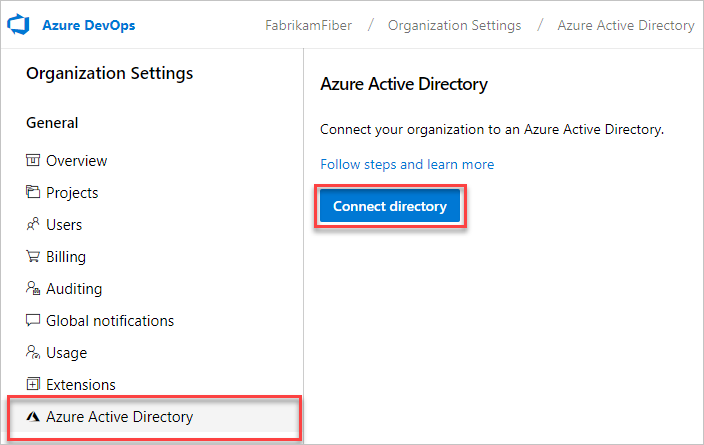
Make sure the Organization where the project is created in the Azure DevOps is connected with the Azure Active Directory of the Azure Subscription that will be used in the lab.
-
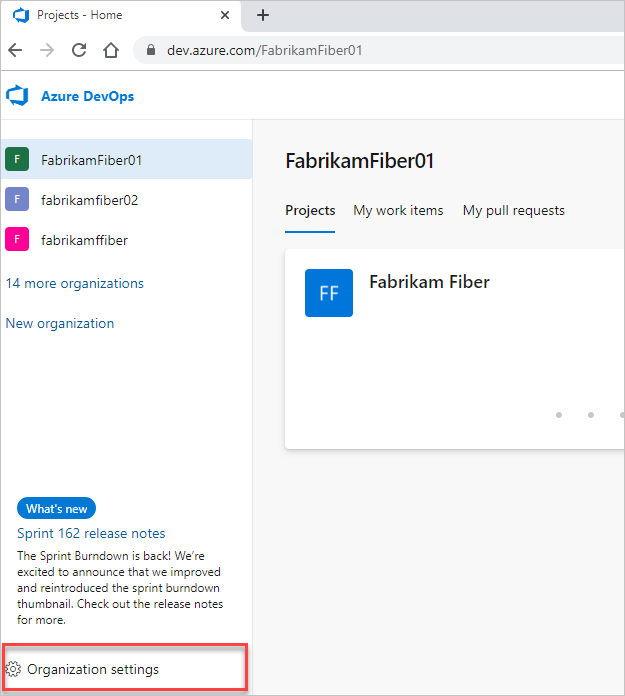
Select your Azure DevOps organization and open the
Organization Settingsmenu: -
On the
Organization Settingsmenu, navigate toAzure Active Directoryand check if your Azure DevOps organization is already connected to an Azure AD. If it is not, press theConnect directorybutton and configure it with your Azure subscription.
-
Step 2: Setup the Hands-On Lab configuration file
-
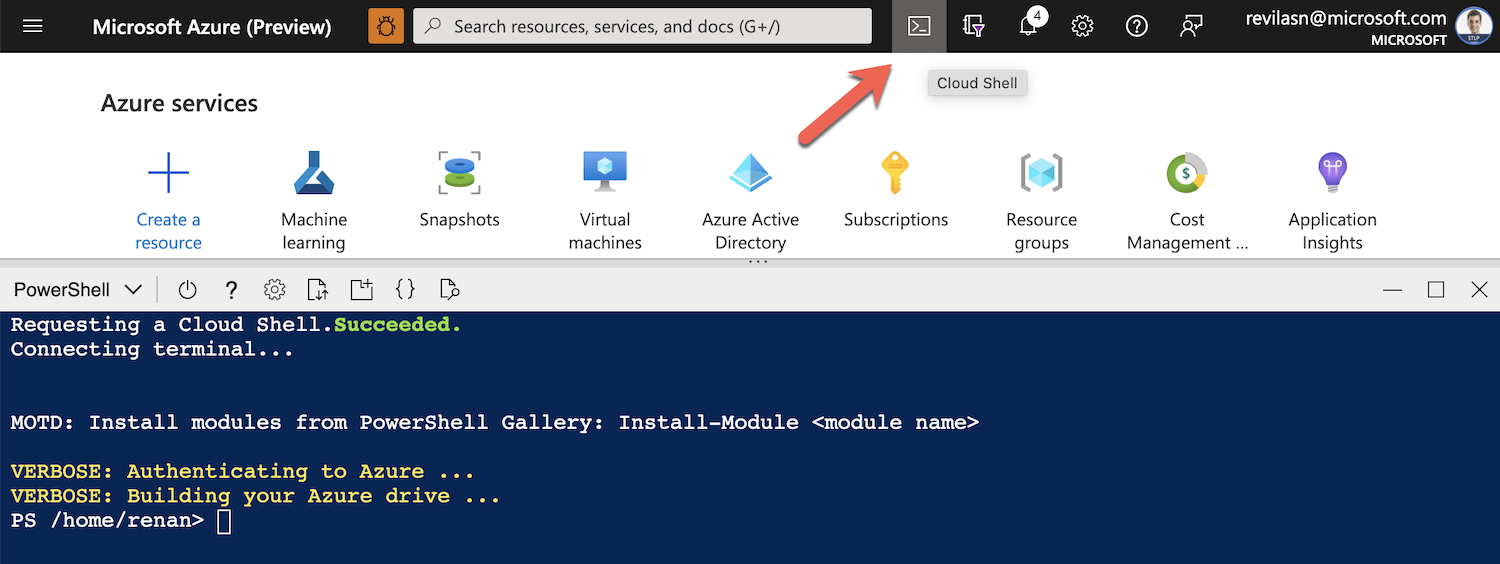
Open the Azure Cloud Shell and select the PowerShell option.
When using the Azure Cloud Shell, be sure you are logged in Azure with the subscription you want to use for the hands-on lab.
If it's the first time you are using Azure Cloud Shell, you will be prompted to create an Azure Storage. Proceed with that storage creation with default values.
-
On the Azure PowerShell terminal: clone the source code of the lab and go to the
holdirectory.git clone https://github.com/microsoft/devsquad-in-a-day.git cd devsquad-in-a-day -
On the Azure PowerShell terminal: execute the following command to create a new config file based on an existing template. Provide arguments to this setup based on the table below:
# Be sure to execute this script under the hol directory
./quickstart/scripts/cloud-setup/Replace-TemplateArgs.ps1
Don't use the default parameters from the table below! You will need to use your own Azure DevOps organization name, Azure DevOps project name and Azure subscription ID. The alias can be any randomized alphanumerical string with less than 8 characters.
Argument Description Example <orgName> Azure DevOps organization name where you will execute the Hands-On Lab org-dataops <projectName> Name of the existing project inside Azure DevOps where you will execute the Hands-On Lab project-dataops <subscriptionId> Azure Subscription ID where the resources will be deployed f7e5bb9e-0f98-4c5d-a5c1-a9154bf3cd61
- (OPTIONAL) If you are using this project as a Hands-On Lab, feel free to proceed to the next step of the lab setup. If you are using this project as a template for dataops, check this additional documentation that explains advanced configuration options.
Step 3: Deploy Azure Resources in your subscription
-
Generate a Personal Access Token (PAT) on Azure DevOps.
-
An environment variable called
AZURE_DEVOPS_EXT_PATthat stores a PAT (Personal Access Token) with Full Access is required to allow the next script to connect to the new Azure DevOps project and deploy all the resources. -
To do so, create the PAT on your new Azure DevOps project then run the following command on the Azure PowerShell terminal:
$env:AZURE_DEVOPS_EXT_PAT="<my PAT goes here>"
-
-
Run the deployment script
-
On the Azure PowerShell terminal: run the
Deploy-AzurePreReqs.ps1script to deploy the pre-required Azure resources:az config set extension.use_dynamic_install=yes_without_prompt Connect-AzureAD ./quickstart/scripts/cloud-setup/Deploy-AzurePreReqs.ps1 -ConfigurationFile "quickstart/configs/cloud-setup/hol.json" -
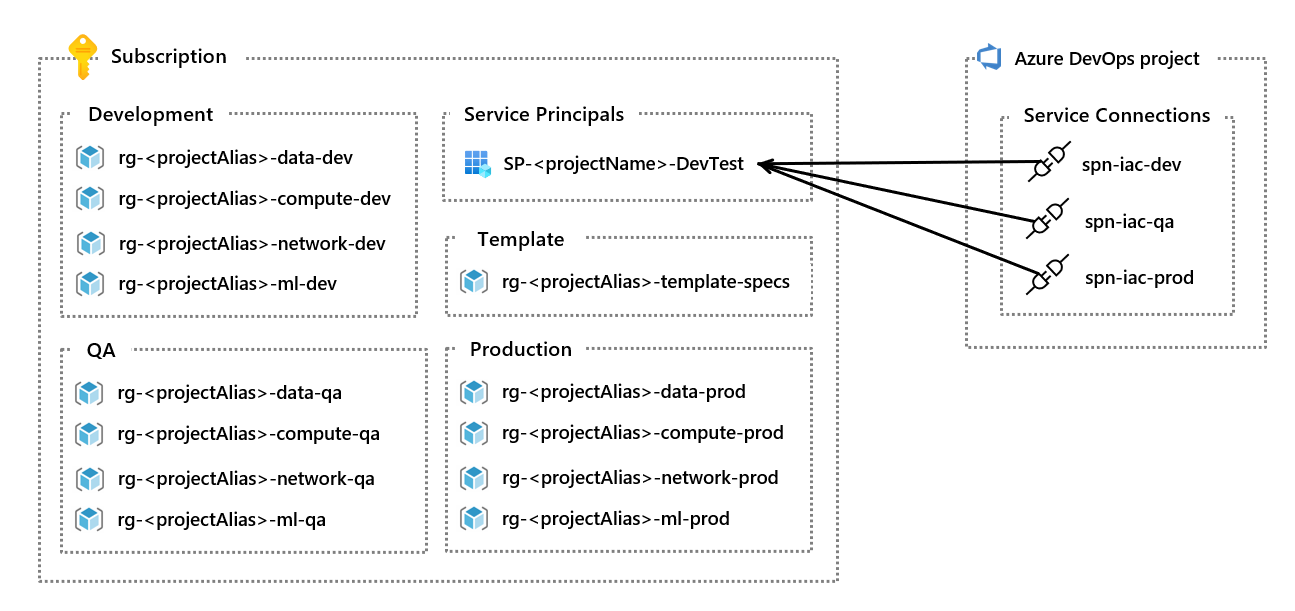
The diagram below shows what Azure resources will be created after the execution of the script.
-
Step 4: Prepare your Azure DevOps project
-
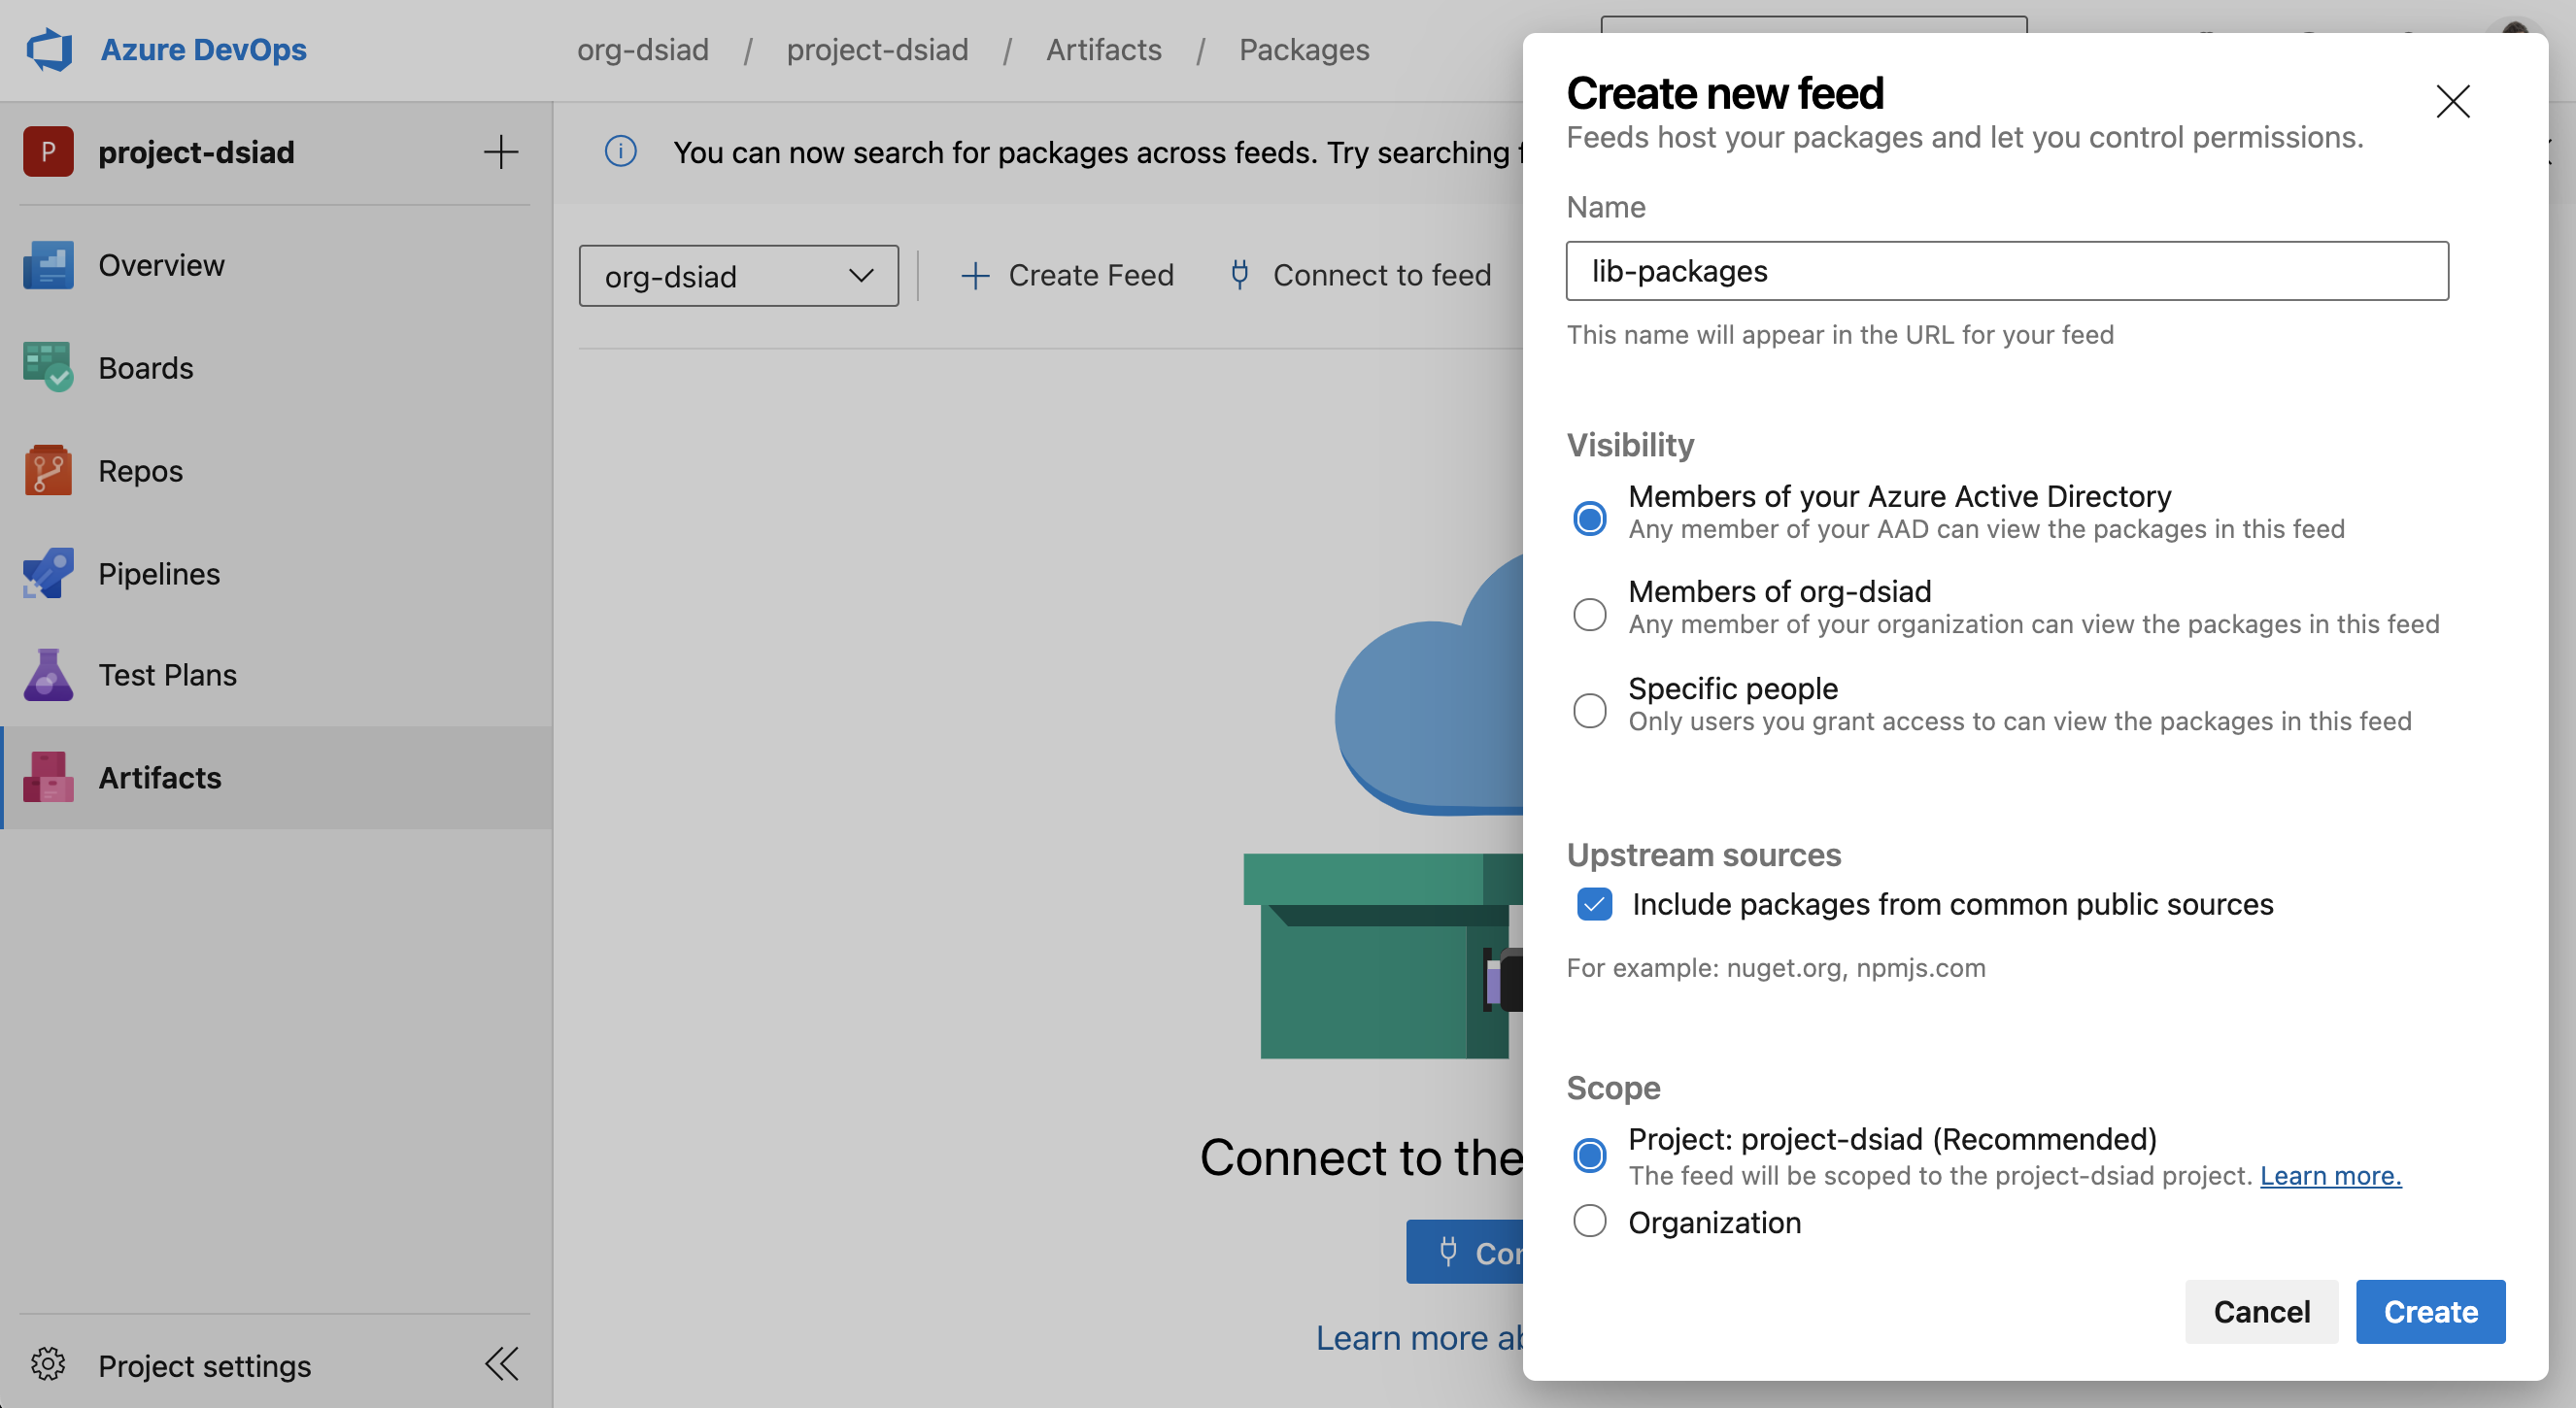
Create an Artifact Feed
-
Azure DevOps project setup
-
On the Azure PowerShell terminal: run the command below.
# You don't need to change any of the following values below
git config --global user.email "hol@microsoft.com"
git config --global user.name "HOL Setup User"
This command configures git and defines an environment variable that will be used to setup your Azure DevOps project.
-
On the Azure PowerShell terminal: run the following script to clone the
holrepo, create the pipelines and service connections inside your new Azure DevOps../quickstart/scripts/dataops/Deploy-AzureDevOps.ps1 -ConfigurationFile "./quickstart/outputs/hol.json" -UsePAT $trueNote the file name is the one inside the output directory and the name is the same name of the projectName that was replaced in the first config file.
-
-
(Optional) If you are using this project as a Hands-On Lab, feel free to proceed to the next step of the lab setup.
Step 5: Create the Hands-On Lab VM
-
Deploy a pre-configured VM that contains all the tools required for executing the Hands-On Lab.
-
On the Azure PowerShell terminal: run
Deploy-LabVM.ps1../quickstart/scripts/labvm/Deploy-LabVM.ps1
-
-
Access the VM resource and assign a new password to the user
labuser.-
Feel free to create any password of your preference, or to use the suggestion below:
-
Username:
labuser -
Password:
Password.1!!
-
-
-
Connect to the VM using a RDP client:
Note that the RDP port of the VM is already configured to allow inbound access.
Hands-On Lab
-
Before starting the Hands-On Lab, you should follow all the steps provided on this quickstart tutorial.
-
For starting the Hands-On Lab, follow these instructions.
