* Update README * Add Test section * Several fixes * Update README.md * Update README.md |
||
|---|---|---|
| .vscode | ||
| images | ||
| src | ||
| test | ||
| .gitignore | ||
| .vscodeignore | ||
| CHANGELOG.md | ||
| LICENSE | ||
| README.md | ||
| gulpfile.js | ||
| package-lock.json | ||
| package.json | ||
| tsconfig.json | ||
| tslint.json | ||
README.md
VSCode App Center Tools · 
This extension provides development support for App Center projects.
NOTE: Currently it supports only React-Native based apps.
Getting Started
- Install VS Code.
- Install the extension
- If you haven't already, please also install:
- react-native-cli
- git
How it works
There are several possible scenarios this extension solves:
-
Start development of a new React Native application with App Center already configured:
-
Clone a new empty repository to your machine or log into the extension with a VSTS access token.
-
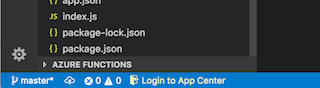
Login to the App Center using the new status bar icon.
-
After logging in click the App Center status bar to show possible menu options

-
You will be prompted to enter a new for your project and select user or organization where you would like to create app in App Center
- App Center sample app will be cloned into the repository you have provided (it will also have preconfigured for App Center Analytics/Crashes/CodePush SDK's)
- Two React Native apps (for iOS and Android) will be created in App Center (
project-name-iosandproject-name-android) - CodePush deployments will be created for both apps
- Apps will be automatically linked with corresponding iOS/Android secret keys and CodePush deployment keys
- Changes will be pushed to your remote repository
- New Testers Distribution Group will be created for every new app in App Center
- App will be connected to your GH repository
masterbranch and new build will be started
-
You will be notified when finished and also we will automatically run
npm installfor you
-
-
Link an existing react-native application to App Center. You will see a "Set Current App" option, when logged in. You can either choose an app from App Center or choose it to be created for you. When you pick "Create an App Center app" option, several options are available:
- Create an app for Android
- Create an app for iOS
- Create apps for both platforms If you choose one of the first two, the app will be created and automatically set as current. If you choose to create two apps, you will have to pick one of them as current when a prompt is shown.
When the app is linked to App Center, several new options appear in the menu:
- Build
- Test
- Distribute
- Crashes
- Analytics They all open the corresponding App Center tabs for the application. "Distribute" also contains CodePush stuff.
-
You would like to open already existing react-native application with CodePush installed. When logged in, the following App Center Menu options should be avaliable under "Distribute > CodePush":
- Set current app for CodePush
- Change current Deployment
- Change target binary verson
- Change if release should be mandatory
- Make new CodePush release
Test
If your React Native application has UI tests you can run it in the App Center cloud using the extension.
Preparing tests
In order to run the tests in App Center cloud you need App Center CLI. To install it run npm install -g appcenter-cli in terminal.
iOS
Currently, extension supports running of XCUI tests only. Please, follow the instructions for App Center portal docs to prepare tests for uploading to the App Center cloud.
Running tests
- Open App Center menu and then click Test button.
TODO image
- To run tests you can use two options:
Run UI testsandRun UI tests asynchronously. CommandRun UI testswill start to build your application for testing, upload it together with tests to App Center cloud and then run it there waiting for tests to be done. CommandRun UI tests asynchronouslydoes the same thing except it exits the command when tests are uploaded, without waiting for test results. Choose the one you prefer the most. Also, you can track progress of command below in status bar.
TODO image
- Select device configuration for tests.
TODO image
- After that,
Output->React Nativewindow will be opened where you can monitor the progress of the build, upload and run the tests.
TODO image
Contributing
There are a couple of ways you can contribute to this repo:
- Ideas, feature requests and bugs: We are open to all ideas and we want to get rid of bugs! Use the Issues section to either report a new issue, provide your ideas or contribute to existing threads.
- Documentation: Found a typo or strangely worded sentences? Submit a PR!
- Code: Contribute bug fixes, features or design changes.
Legal
Before we can accept your pull request you will need to sign a Contribution License Agreement. All you need to do is to submit a pull request, then the PR will get appropriately labelled (e.g. cla-required, cla-norequired, cla-signed, cla-already-signed). If you already signed the agreement we will continue with reviewing the PR, otherwise system will tell you how you can sign the CLA. Once you sign the CLA all future PR's will be labeled as cla-signed.
Code of conduct
This project has adopted the Microsoft Open Source Code of Conduct. For more information see the Code of Conduct FAQ or contact opencode@microsoft.com with any additional questions or comments.