|
|
||
|---|---|---|
| docs/Images | ||
| src | ||
| .gitignore | ||
| LICENSE | ||
| Partner-Center-Connector.sln | ||
| README.md | ||
README.md
Partner Center Connector
Since it is not supported for a partner to redirect a Microsoft online cloud customer to their multi-tenant infrastructure either for federation or synchronization this sample was developed. It is a management agent and metaverse extension for Microsoft Identity Manager, that leverages the Partner Center API to synchronize customer and users to the partner's infrastructure. With this sample and Active Directory Federation Services (ADFS) it is possible to utilize the objects in the multi-tenant directory for authorization and Azure AD for authentication.
How It Works
First you will need to compile both the Connector and MVExtension projects. Then copy all of the files from the output directories for both projects to the extensions folder on the server where the Microsoft Identity Manager 2016 Synchronization Service is installed. Typically the path of the extension directory will be C:\Program Files\Microsoft Forefront Identity Manager\2010\Synchronization Service\Extensions unless it was modified when the service was installed.
Next you will need to create the required objects in metaverse. These objects are required in order for the management agent to perform all operations as excepted. Follow the steps below in order to create the required objects.
Prerequisites
This solution is designed for use with Microsoft Forefront Identity Manager 2010 R2 or Microsoft Identity Manager 2016. In order to compile the source code you will need to add a reference to Microsoft.MetadirectoryServicesEx.dll. You can find this file in the bin directory where you have installed the Synchronization Service. The version referenced by the source should match the version you have deployed.
Add the Customer Object Type
-
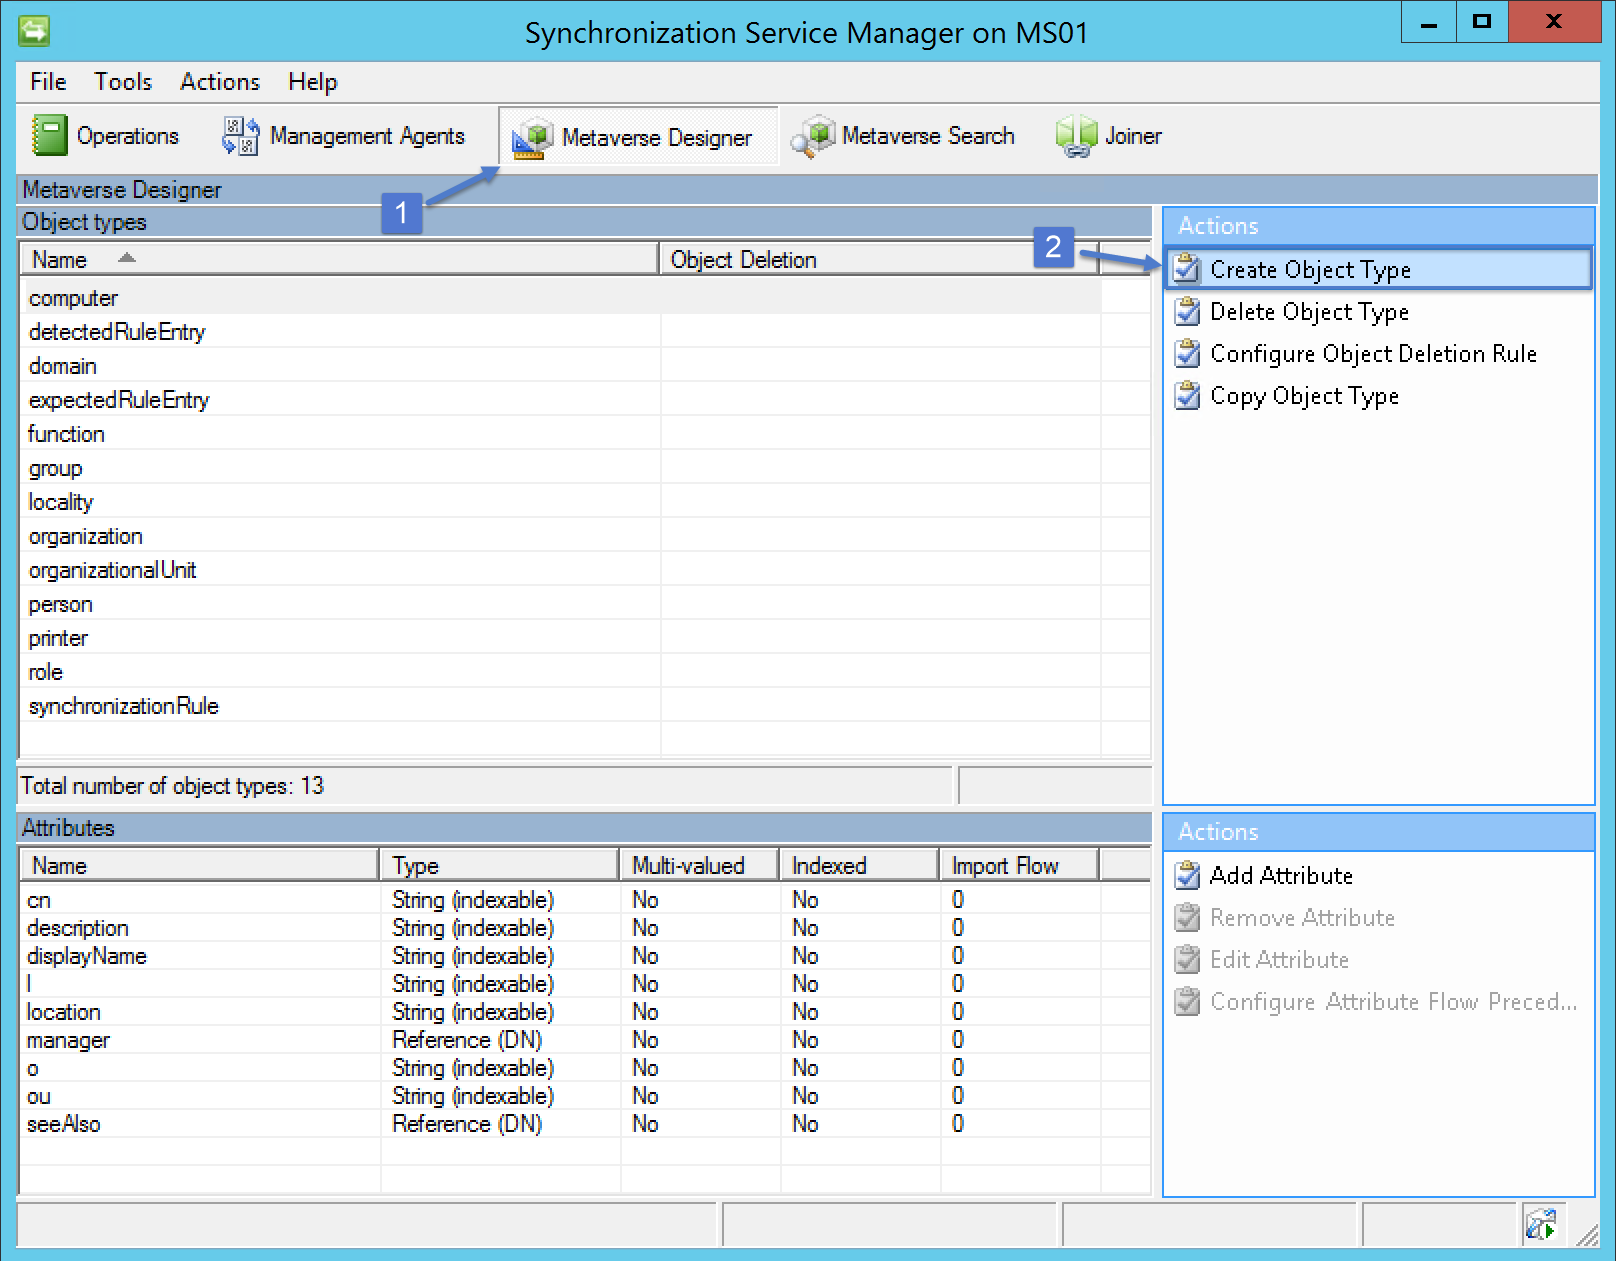
Open the Synchronization Service Manager and then click on Metaverse Designer
-
Click Create Object Type found in the Actions pane
-
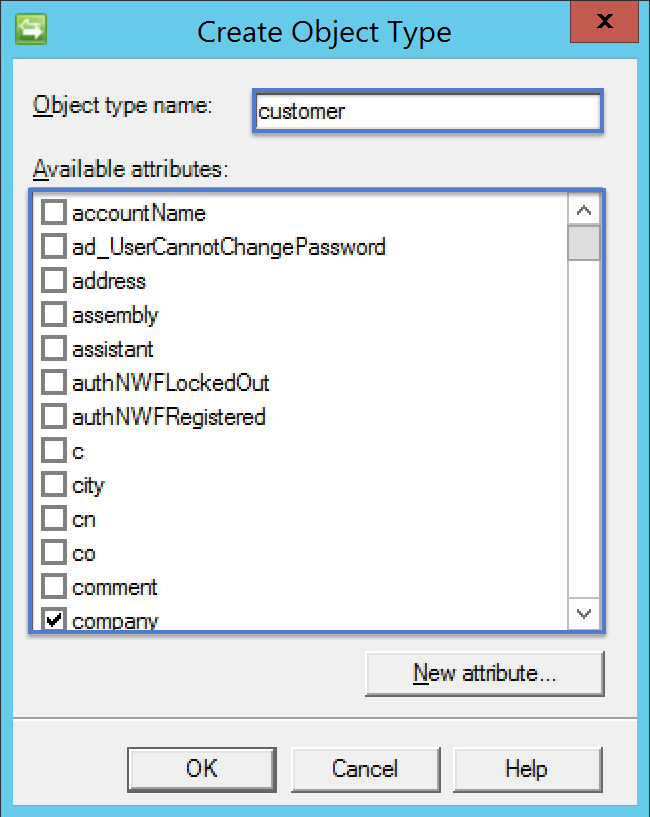
Specify customer for the Object type name and select the following attributes: company, domain, and objectID
-
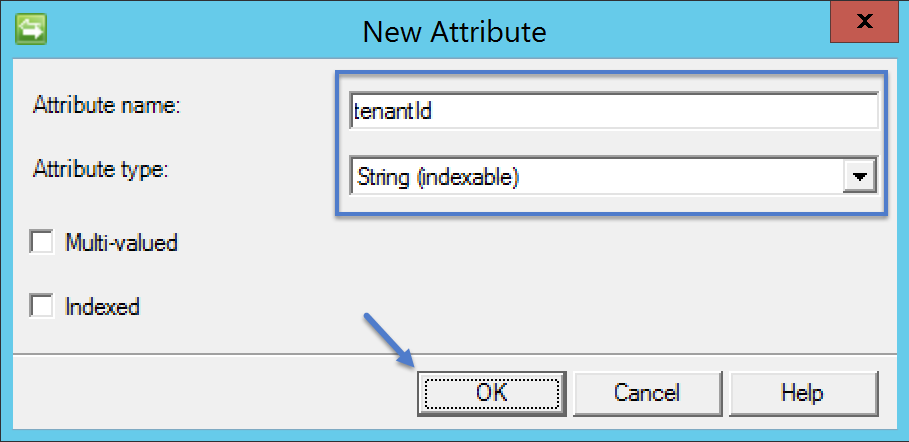
Create a new attribute for the tenant identifier and then click OK on the Create Object Type wizard to complete the creation of the customer object type
Add Attributes to Person Object Type
-
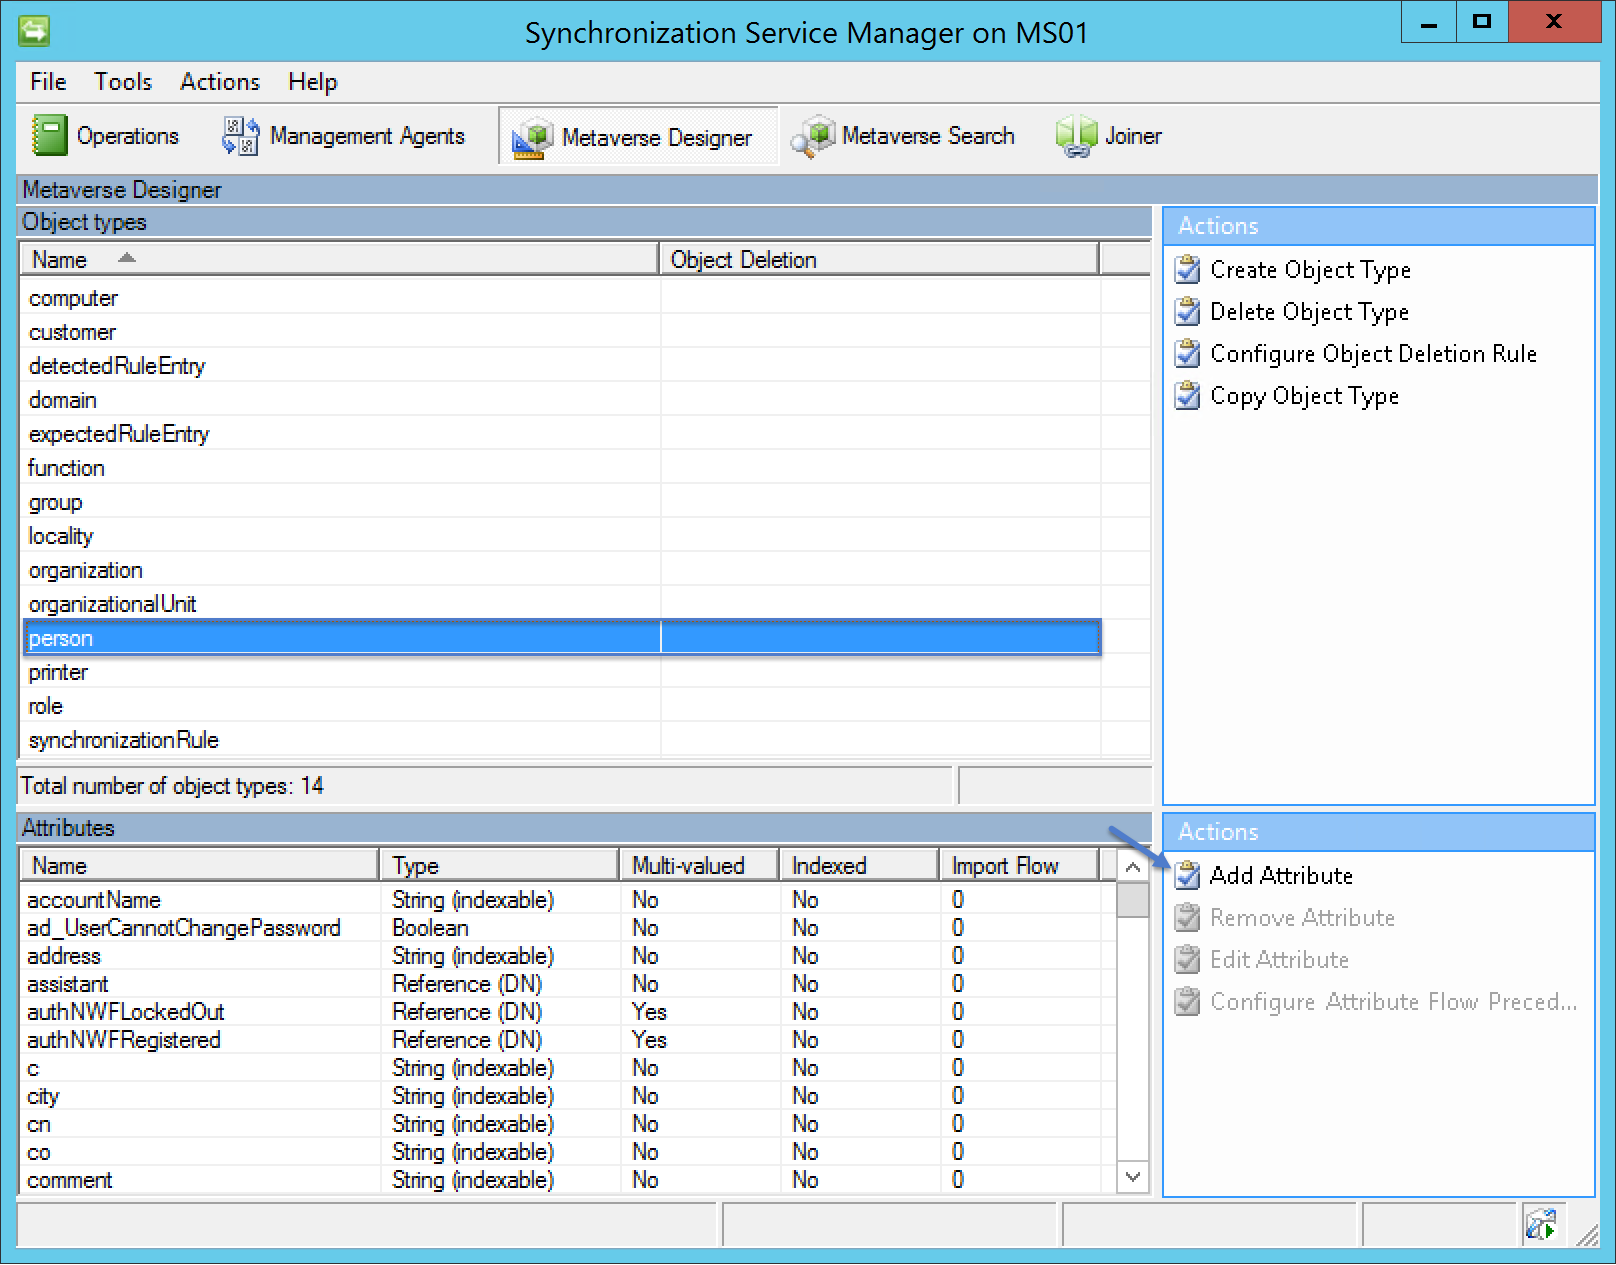
Select the Person object and then click Add Attribute in the actions pane
-
Add the attributes documented in the table below
Attribute Name Attribute Type Multi-valued Indexed usageLocation | String (non-indexable) | No | Yes | userPrincalName | String (indexable) | No | Yes |
Setup the Management Agent
-
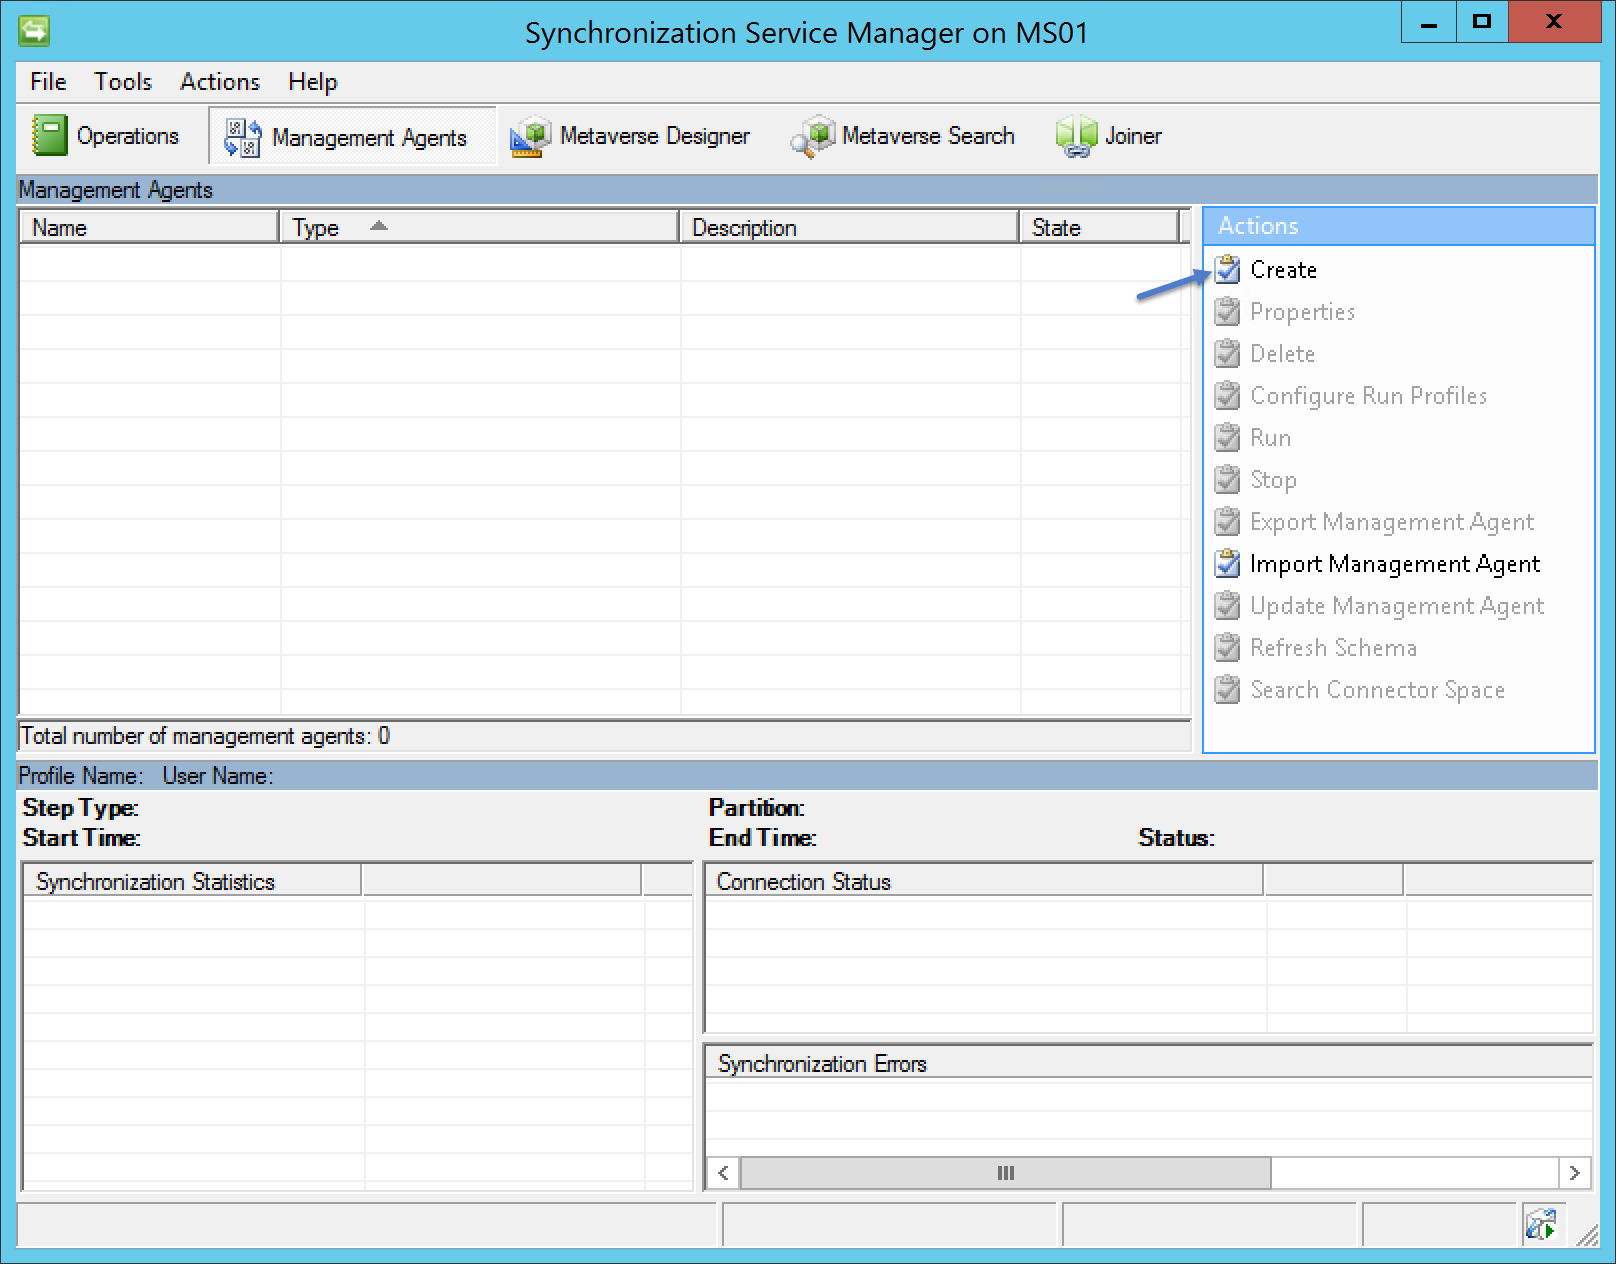
Open the Management Agents section of the Synchronization Services Manager and then click Create in the actions pane
-
Select Extensible Connectivity 2.0 from the Management agent for drop down menu
-
Specify an appropriate name (e.g. PCMA, which is short for Partner Center Management Agent) and then click Next
-
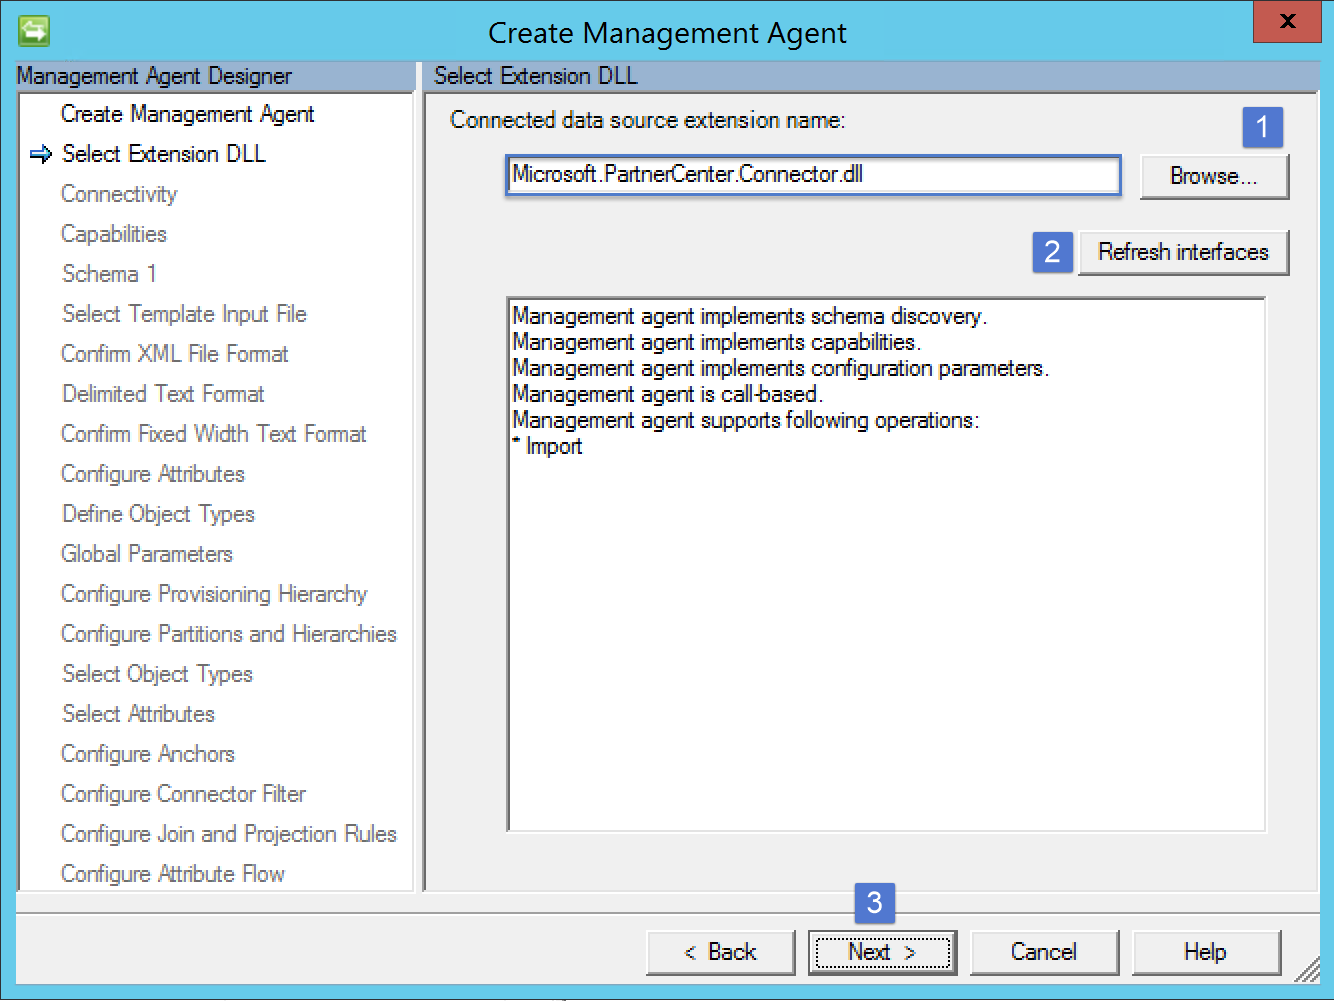
Select the Microsoft.PartnerCenter.Connector.dll as the extension and then click Refresh interfaces. Then click Next to continue
-
Specify an application identifier and secret key that has been configured in Azure Active Directory for use with the Partner Center API. Also, specify appropriate credentials that have AdminAgent privileges.
-
Accept the defaults for the Configure Partitions and Hierarchies page and click Next
-
Select the customer and user object types from the Select Object Types page and then click Next
-
Select all of the attributes on the Select Attributes page and then click Next
-
Accept the defaults for the Configure Anchors page and then click Next
-
Accept the defaults for the Configure Connectors Filter and then click Next
-
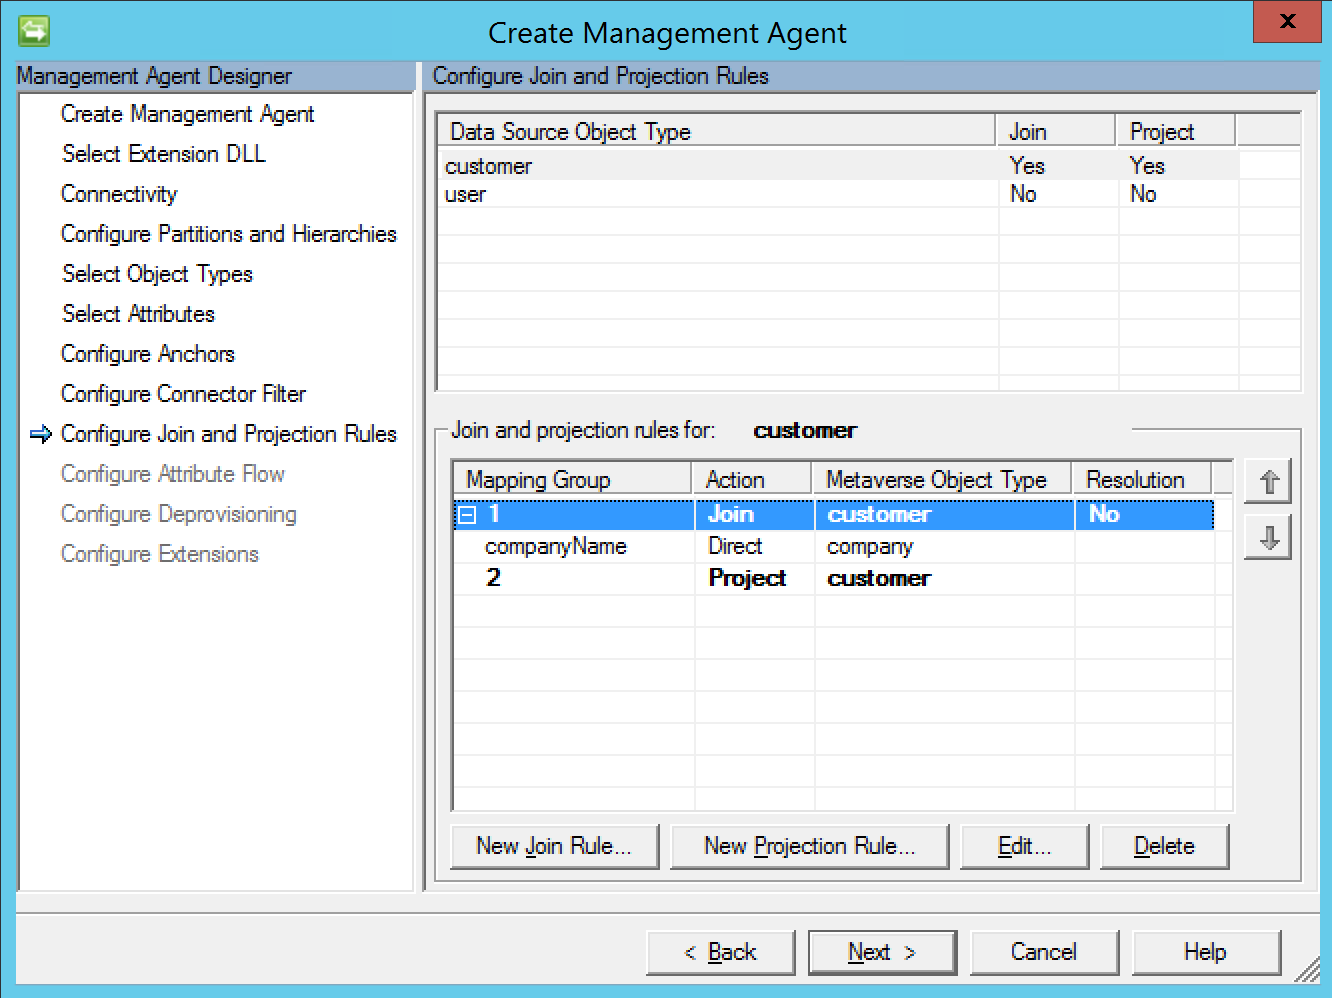
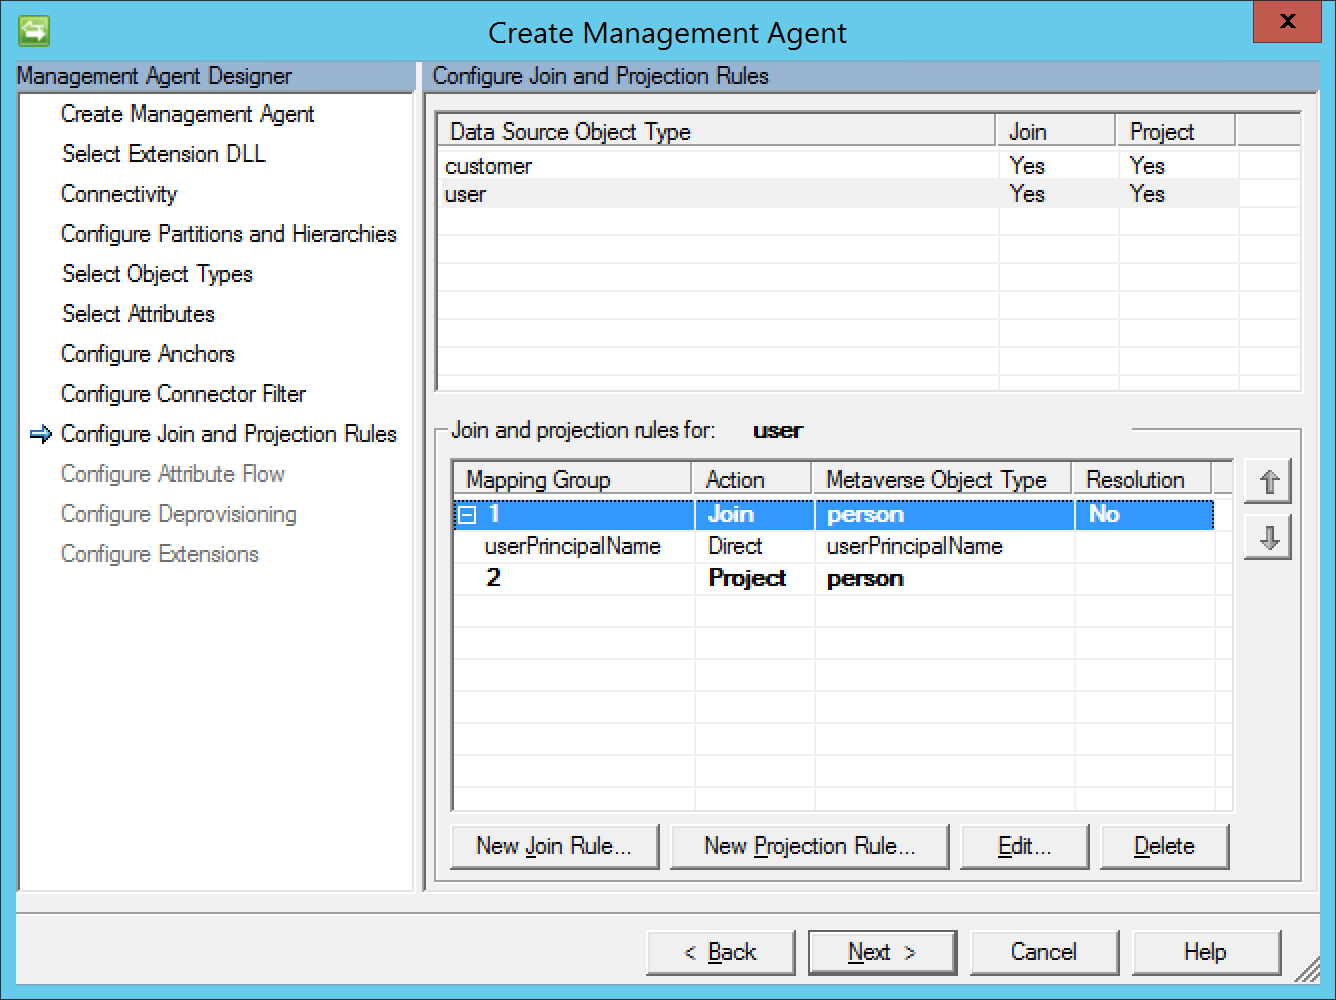
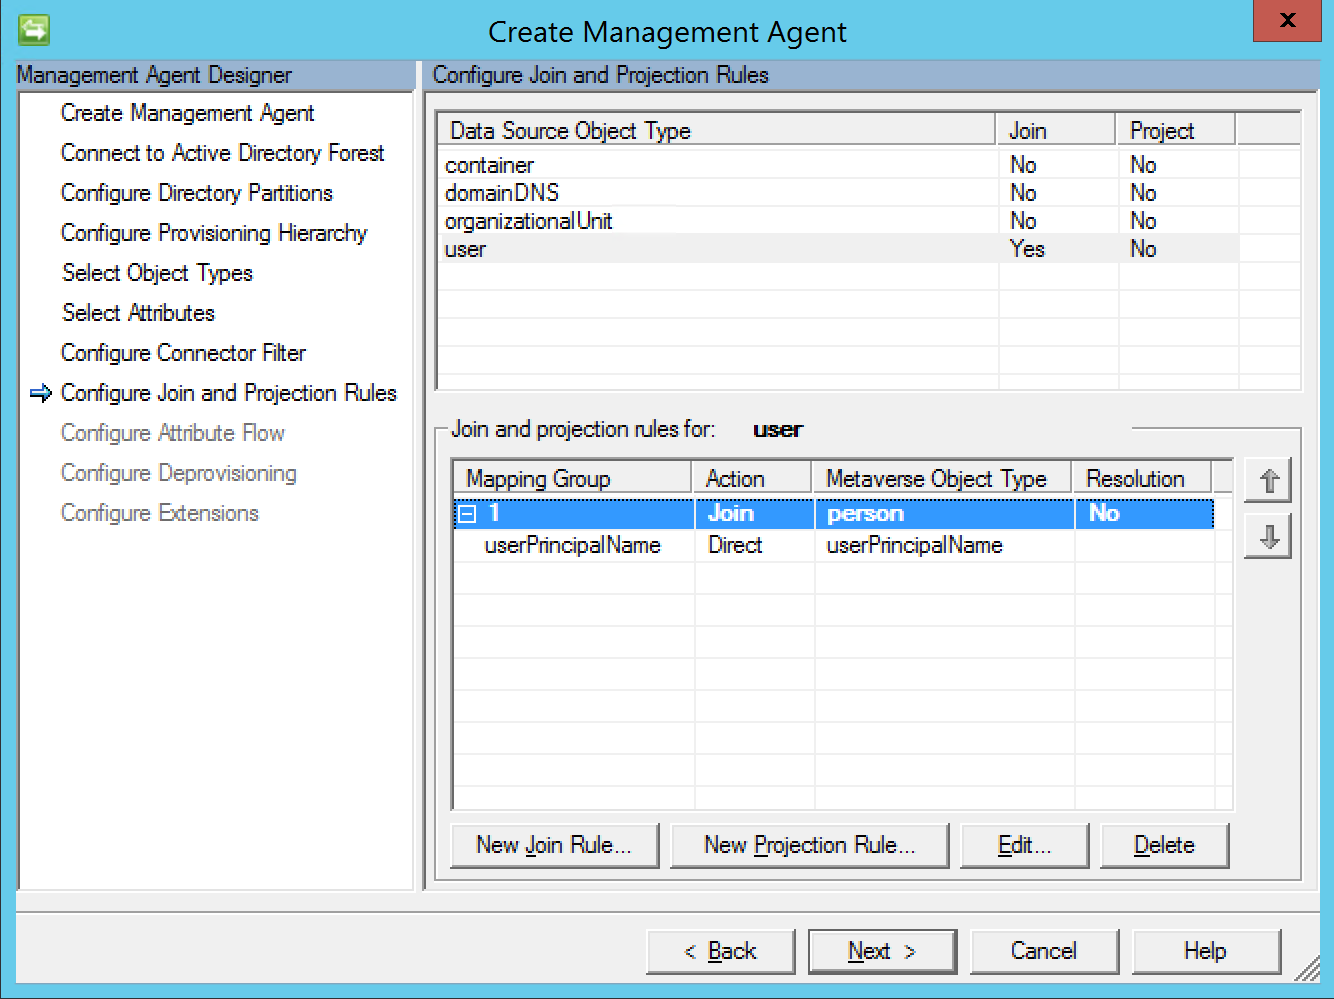
Create the following join and projection rules
-
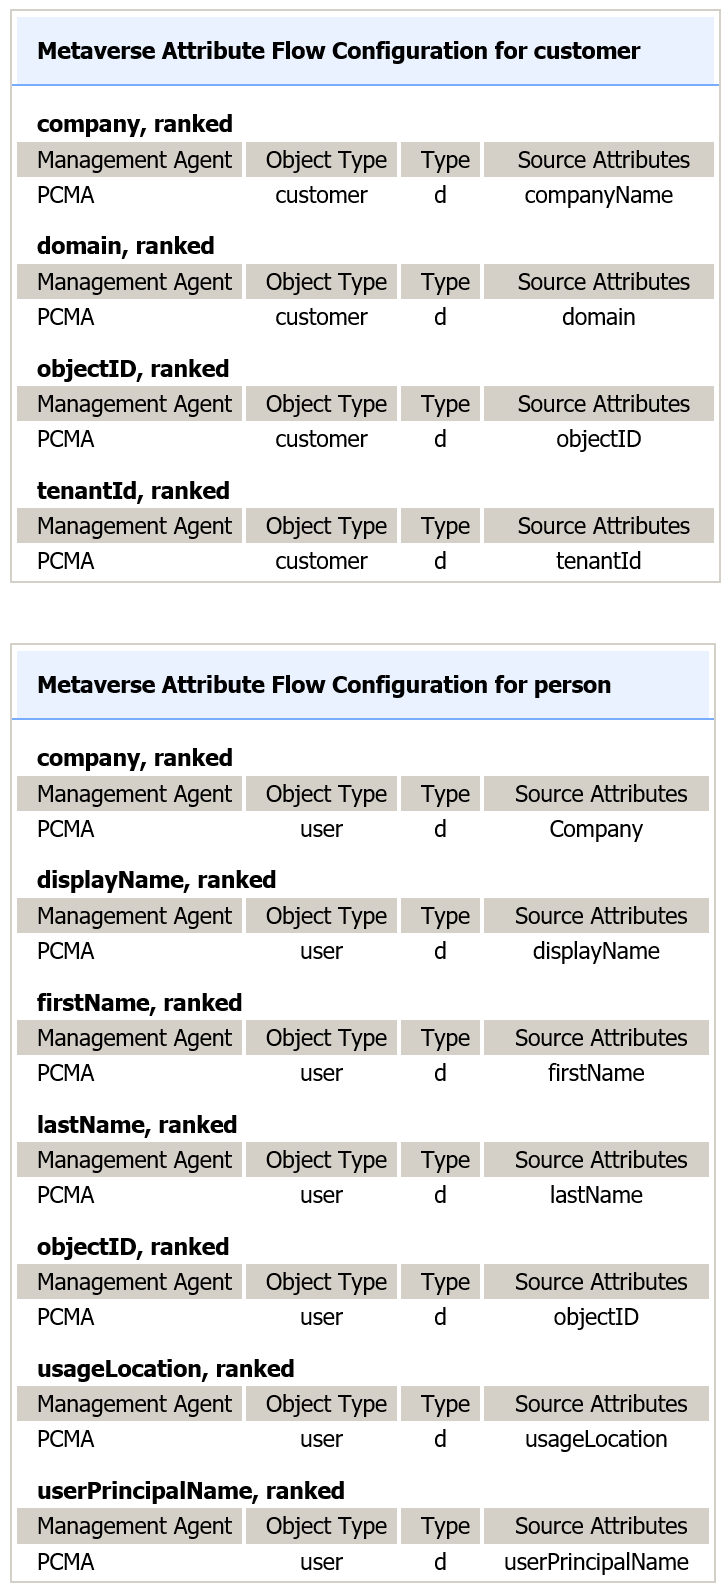
Configure the appropriate attribute flows as shown in the figure below
-
Accept the defaults for the Configure Deprovisioning page and then click Next
-
Click Finish to complete the Create Management Agent wizard
Create Active Directory Management Agent
The Active Directory Management Agent will be perform the provisioning of organizational units and users within the partner's instance of Active Directory. Perform the following steps in order to create the management agent
-
Open the Management Agents section of the Synchronization Services Manager and then click Create in the actions pane
-
Select Active Directory Domain Services from the Management agent for drop down menu
-
Specify ADMA for the name. If you would like to utilize a different name then you will need to update Provision function in the metaverse entension.
public void Provision(MVEntry mventry) { ConnectedMA agent; int connectors; try { // The following line of code will need to be modified if you utilize a different name for the // Active Directory management agent. agent = mventry.ConnectedMAs["INSERT-THE-APPROPRIATE-NAME-HERE"]; connectors = agent.Connectors.Count; if (connectors != 0) { return; } if (mventry.ObjectType.Equals("customer", StringComparison.CurrentCultureIgnoreCase)) { ProvisionCustomer(agent, mventry); } if (mventry.ObjectType.Equals("person", StringComparison.CurrentCultureIgnoreCase)) { ProvisionPerson(agent, mventry); } } finally { agent = null; } } -
Specify the appropriate connection infomration on the Connect to Active Directory Forest page and then click Next
-
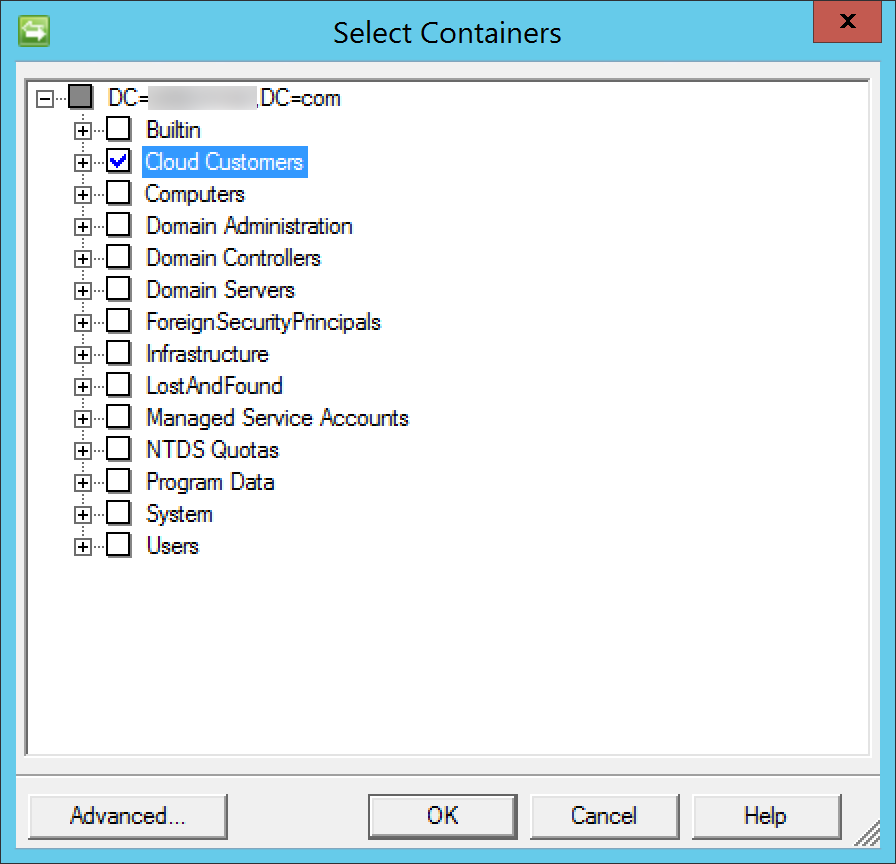
On the Configure Directory Partitions page select the appropriate partition, then click Containers to select the organizational units that needed to be included in the synchronization process. Be sure to include the organization unit specified in the Settings.xml utilized by the metaverse extension.
-
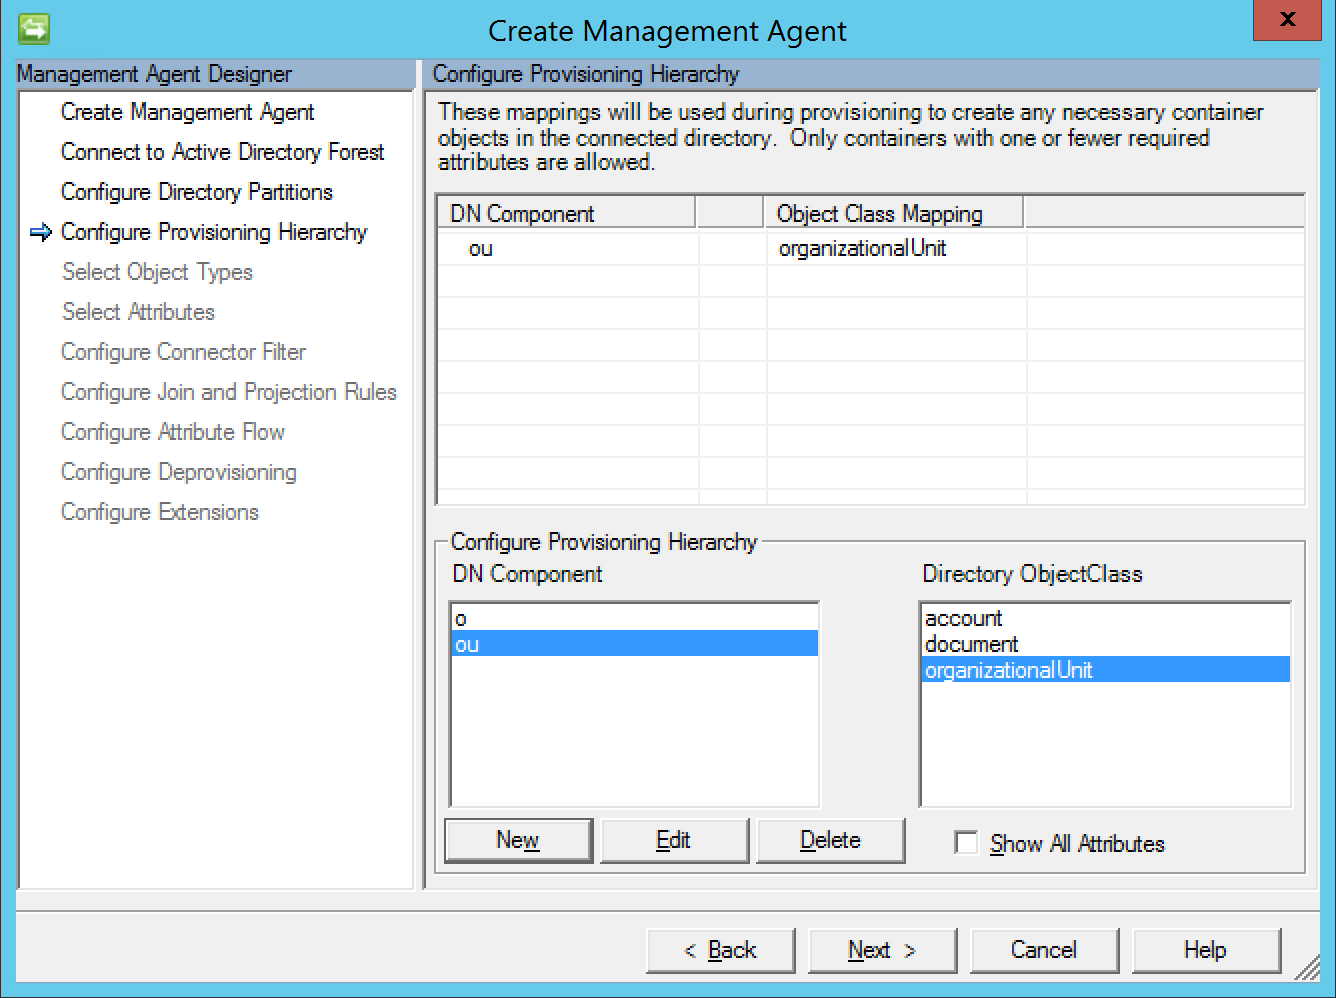
On the Configure Provisioning Hierarchy page map ou to organizationalUnit. With this configuration any organization unit the path of the user being provisioned that does not exist will be created automatically.
-
On the Select Object Types page select user and then click Next
-
On the Select Attributes page select the following attributes: company, displayName, givenName, sAMAccountName, sn, unicodePwd, userAccountControl, and userPrincipalName. Once all of these attributes has been selected click Next
-
Click Next on the Configure Connector Filters page to accept the defaults
-
Create a join connector for the user object type
-
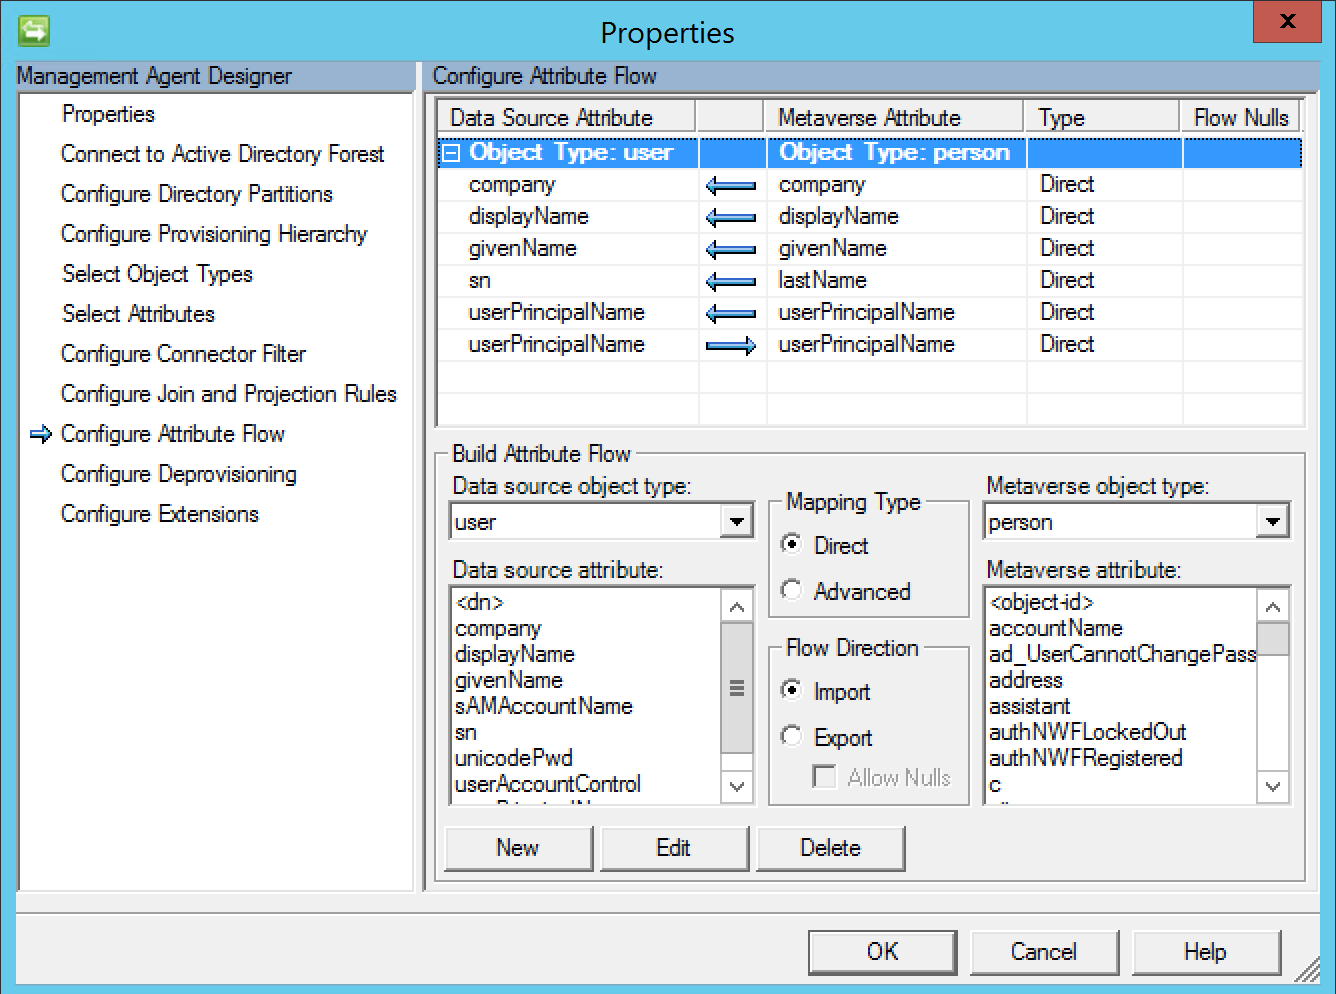
On the Configure Attribute Flow configure the flows shown in table below
-
On the Configure Deprovisioning page click Next to accept the defaults
-
On the Configure Extensions page click Finish to accept the defaults and finish creating the AD management agent
Enabling Provisioning
A metaverse extension is utilized to provision objects into Active Directory. This is not required if you are planning to leverage the Microsoft Identity Manager Portal.
-
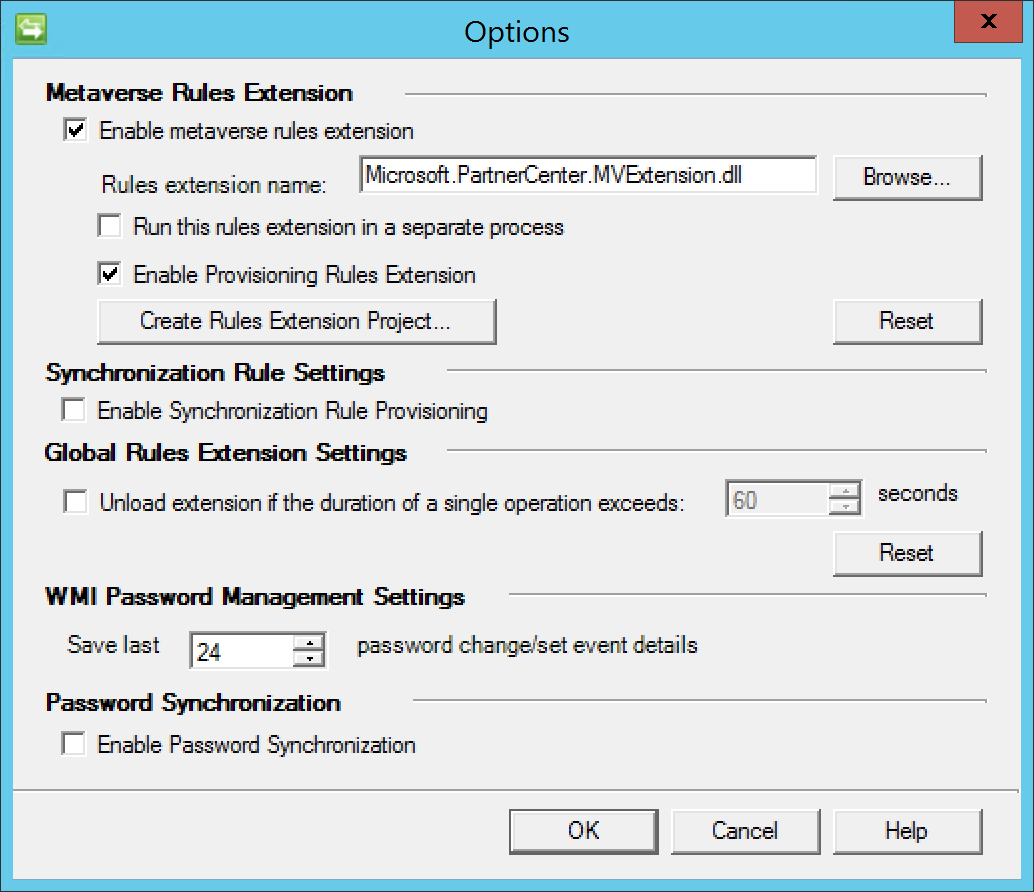
Click Tool and then select Options
-
Configure the options as shown in the figure below and then click OK
-
Modify the Settings.xml configuration file found in the extension directory (C:\Program Files\Microsoft Forefront Identity Manager\2010\Synchronization Service\Extensions). This file controls where the users will be created and what base password they will be assigned. Please note that all user accounts provisioned through this process will be disabled by default.
Running the Sample
This solution requires that a Full Import and Full Synchronization be performed against the AD management agent before attempting any other operation. To avoid any issues it is recommended that you execute the following run profiles against the specified management agent
| Run Profile | Management Agent |
|---|---|
| Full Import | ADMA |
| Full Sync | ADMA |
| Full Import | PCMA |
| Full Sync | PCMA |
| Full Import | ADMA |
| Full Sync | ADMA |
| Export | ADMA |
| Delta Import | ADMA |
Code of Conduct
This project has adopted the Microsoft Open Source Code of Conduct. For more information see the Code of Conduct FAQ or contact opencode@microsoft.com with any additional questions or comments.
License
Copyright (c) Microsoft Corporation. All rights reserved.
Licensed under the MIT License.
