This pr is auto merged as it contains a mandatory file and is opened for more than 10 days. |
||
|---|---|---|
| assets/images | ||
| .gitignore | ||
| LICENSE | ||
| README.md | ||
| SECURITY.md | ||
| sqlservbdc-app-deploy-1.1.0.vsix | ||
| sqlservbdc-app-deploy-1.3.0.vsix | ||
| sqlservbdc-app-deploy-1.4.0.vsix | ||
README.md
SQL Server Big Data Cluster App Deploy Extension
Visual Studio Code Extension for deploying applications to a SQL Server Big Data Cluster
Example Usage
This extension is in preview. If you find any bugs or have any feedback, feel free to reach out.
Install
Download the sqlservbdc-app-deploy .vsix file in order to install the extension as part of Visual Studio Code.
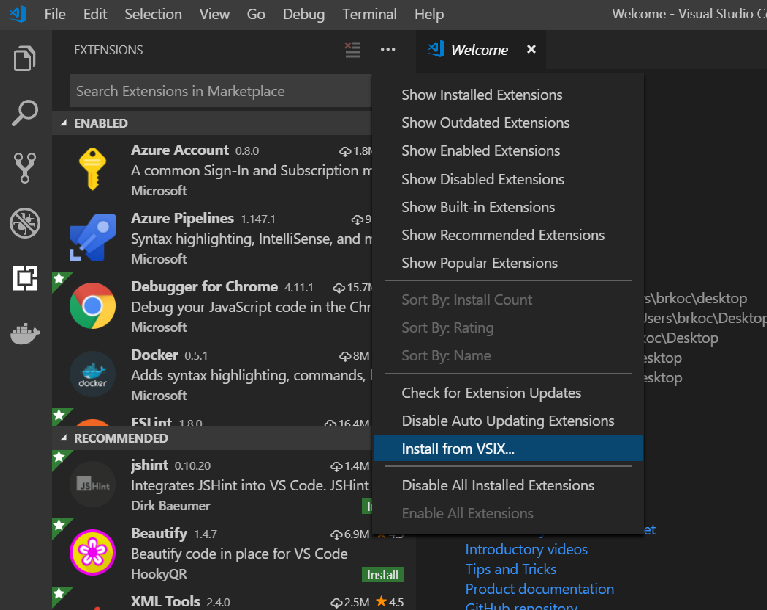
Launch VS Code and navigate to the Extensions sidebar.
Click the … context menu on the top of the side bar and select Install from vsix
Find the sqlservbdc-app-deploy .vsix file you downloaded and choose that to install
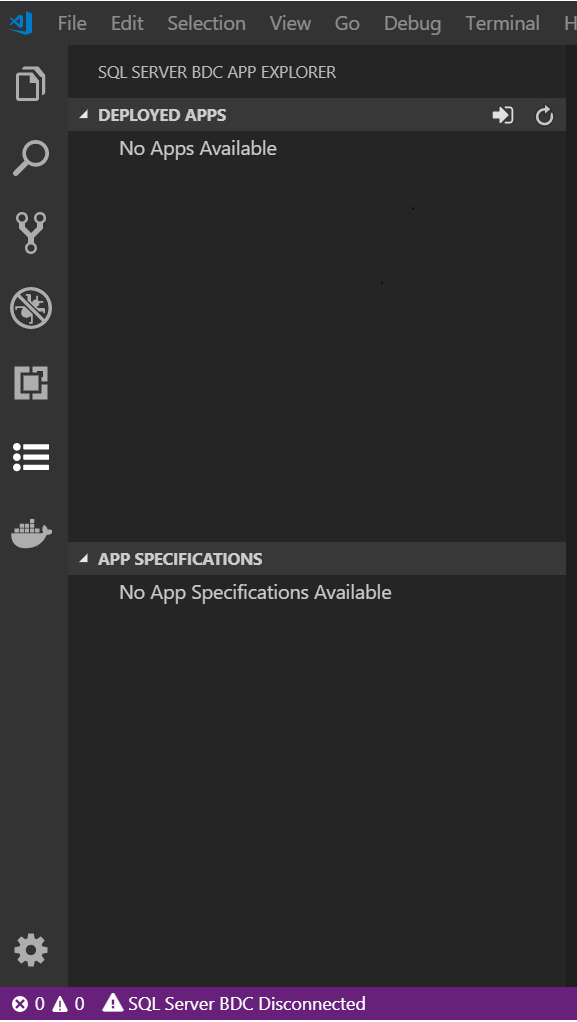
Once the SQL Server Big Data Cluster App Deploy extension has been installed, it will prompt you to reload VS Code. You should now see the SQL Server BDC App Explorer in your sidebar.
App Explorer
When you click on it, a side pane will load showing you that you have no apps or app specifications available:
New Connection
You may connect to your cluster endpoint either by clicking on the status bar at the bottom that says SQL Server BDC Disconnected or you may click on the New Connection button at the top with the arrow pointing into a doorway. Please connect to the controller endpoint at https://<ip>:30080. The proxy endpoint at https://<ip>:30777 is no longer be valid.
Please use version 1.4.0, if you would like to do an Active Directory (AD) login. Version 1.1.0 only supports Basic. Version 1.4.0 is compatible with the latest version of Visual Studio Code (v1.53.2). You will then be prompted for the appropriate endpoint, username, and password. If given the correct credentials and app endpoint, you will be notified that you've been connected to the cluster and you will see any deployed apps populated in the sidebar. If you successfully connect, your endpoint and username will be saved to ./sqldbc as part of your user profile. No password or tokens will ever be saved. When logging in again, the prompt will prefill with your saved host and username but always require you to input a password. If you wish to connect to a different cluster endpoint, just click the New Connection again. The connection will automatically close if you close VS Code or if you open a different workspace and you will need to reconnect.
App Template
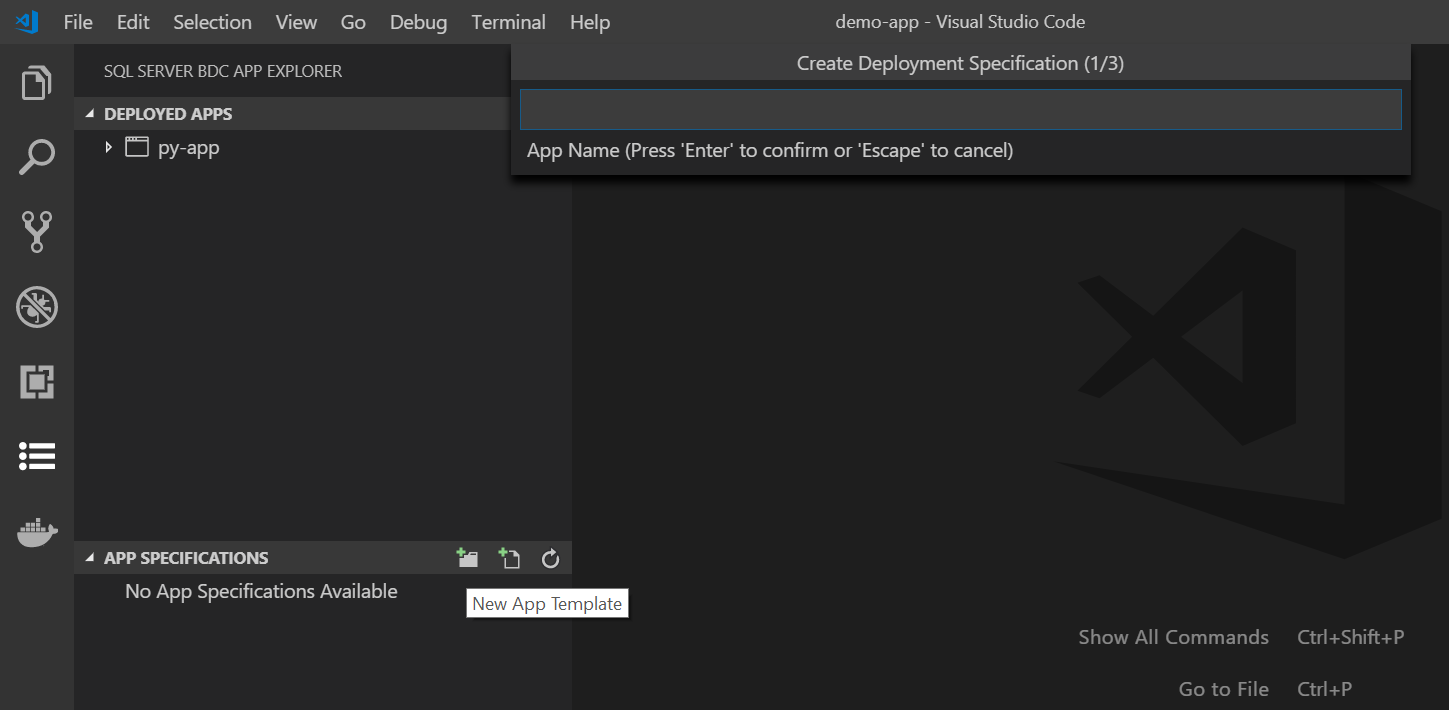
To deploy a brand new app from one of our templates, click on the New App Template button on the App Specifications pane, where you will be prompted for the name, the runtime, and what location you would like to place the new app in on your local machine. It is advised that you place it in your current VS Code workspace so that you can use the full functionality of the extension, but you may place it anywhere in your local file system:
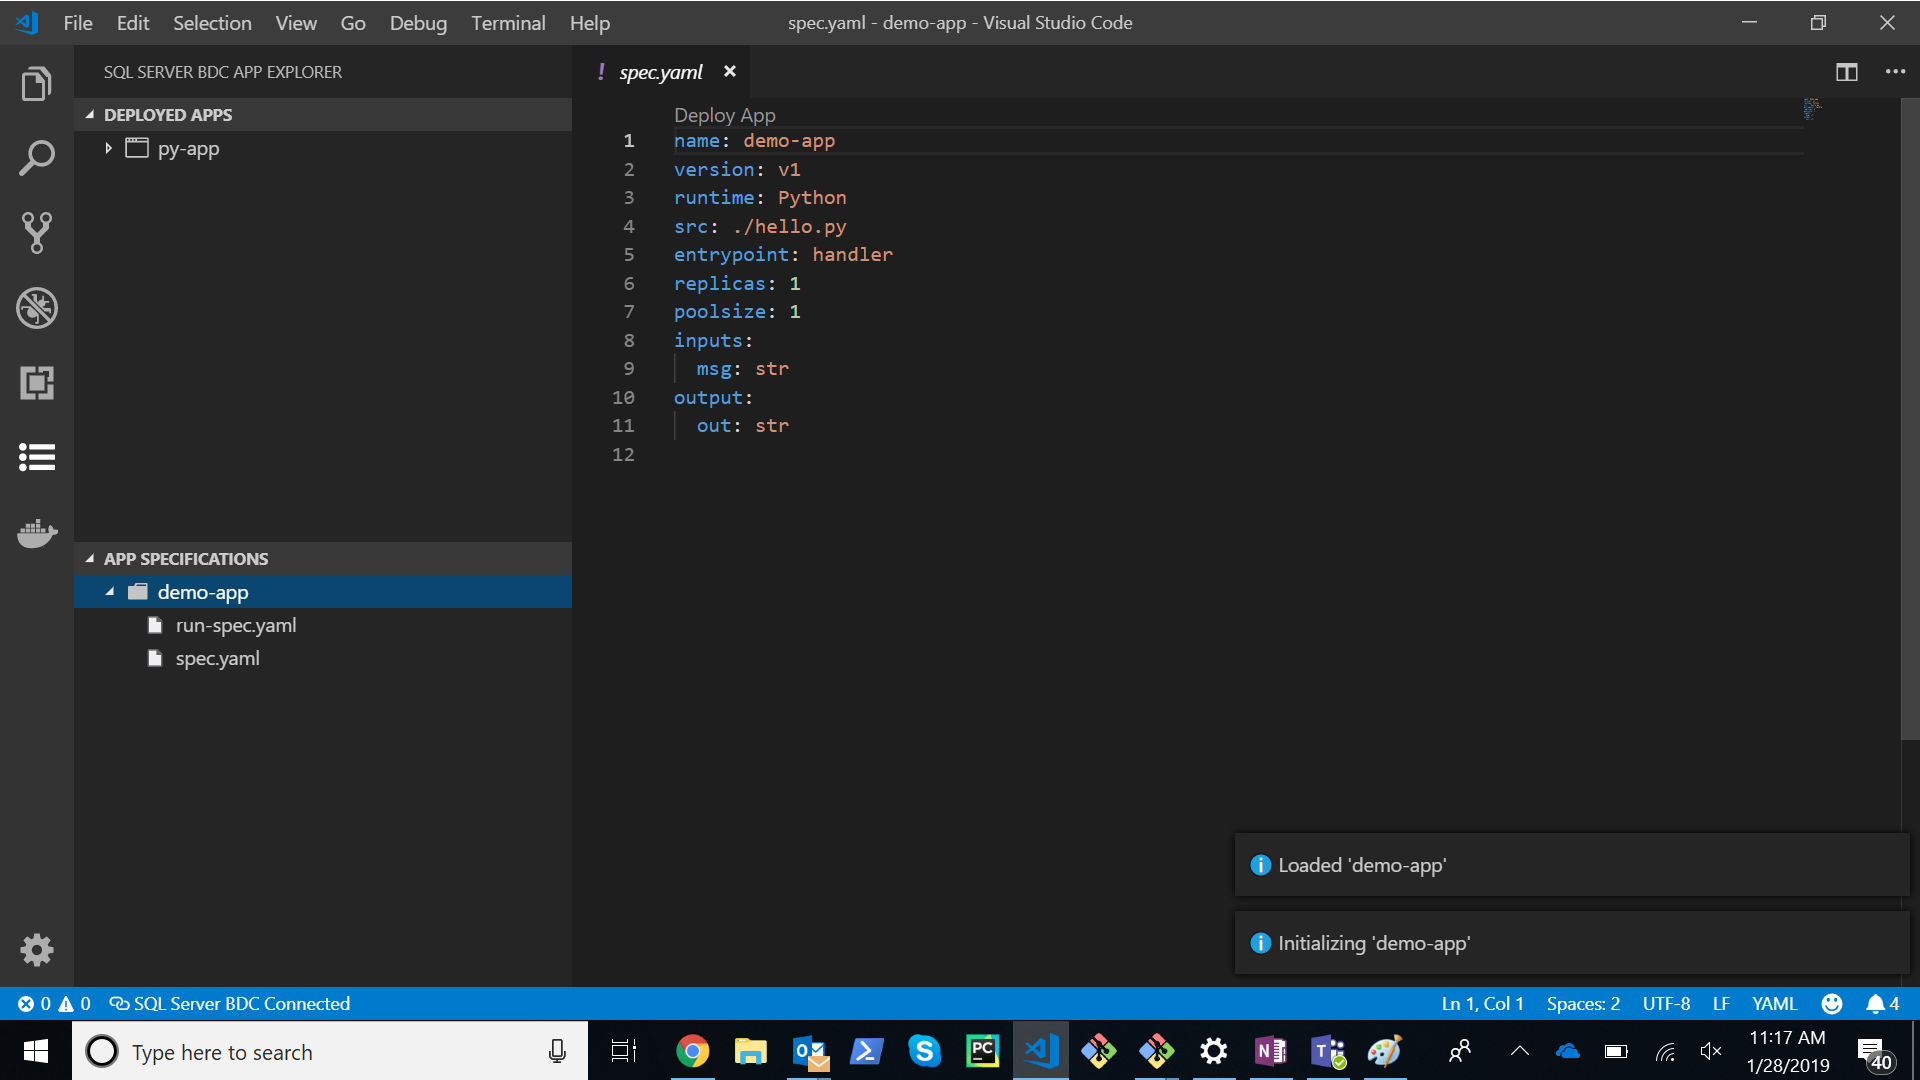
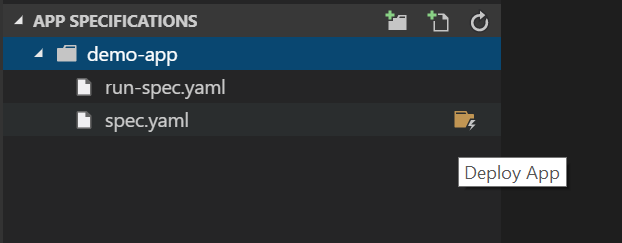
Once completed, a new App Template will be scaffolded for you at the location you specified and the deployment spec.yaml will open in your workspace. If the directory you selected is in your workspace, you will also be able to see it listed under the App Specifications pane:
The template is a simple Hello World app that is laid out as follows:
spec.yaml- Tells the cluster how to deploy your app
run-spec.yaml- Tells the cluster how you'd like to call your app
handler.py- This is your source code file as specified by
srcin spec.yaml - It has one function called
handlerthat is considered theentrypointof the app as shown inspec.yaml. It takes in a string input calledmsgand returns a string output calledout. These are specified ininputsandoutputsof thespec.yaml.
- This is your source code file as specified by
If you do not want a scaffolded template and would just prefer a spec.yaml for deployment of an app you have already built, you may click the New Deploy Spec button next to the New App Template button and go through the same process, but you will just receive the spec.yaml, which you may modify how you choose.
Deploy App
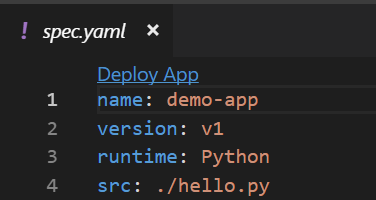
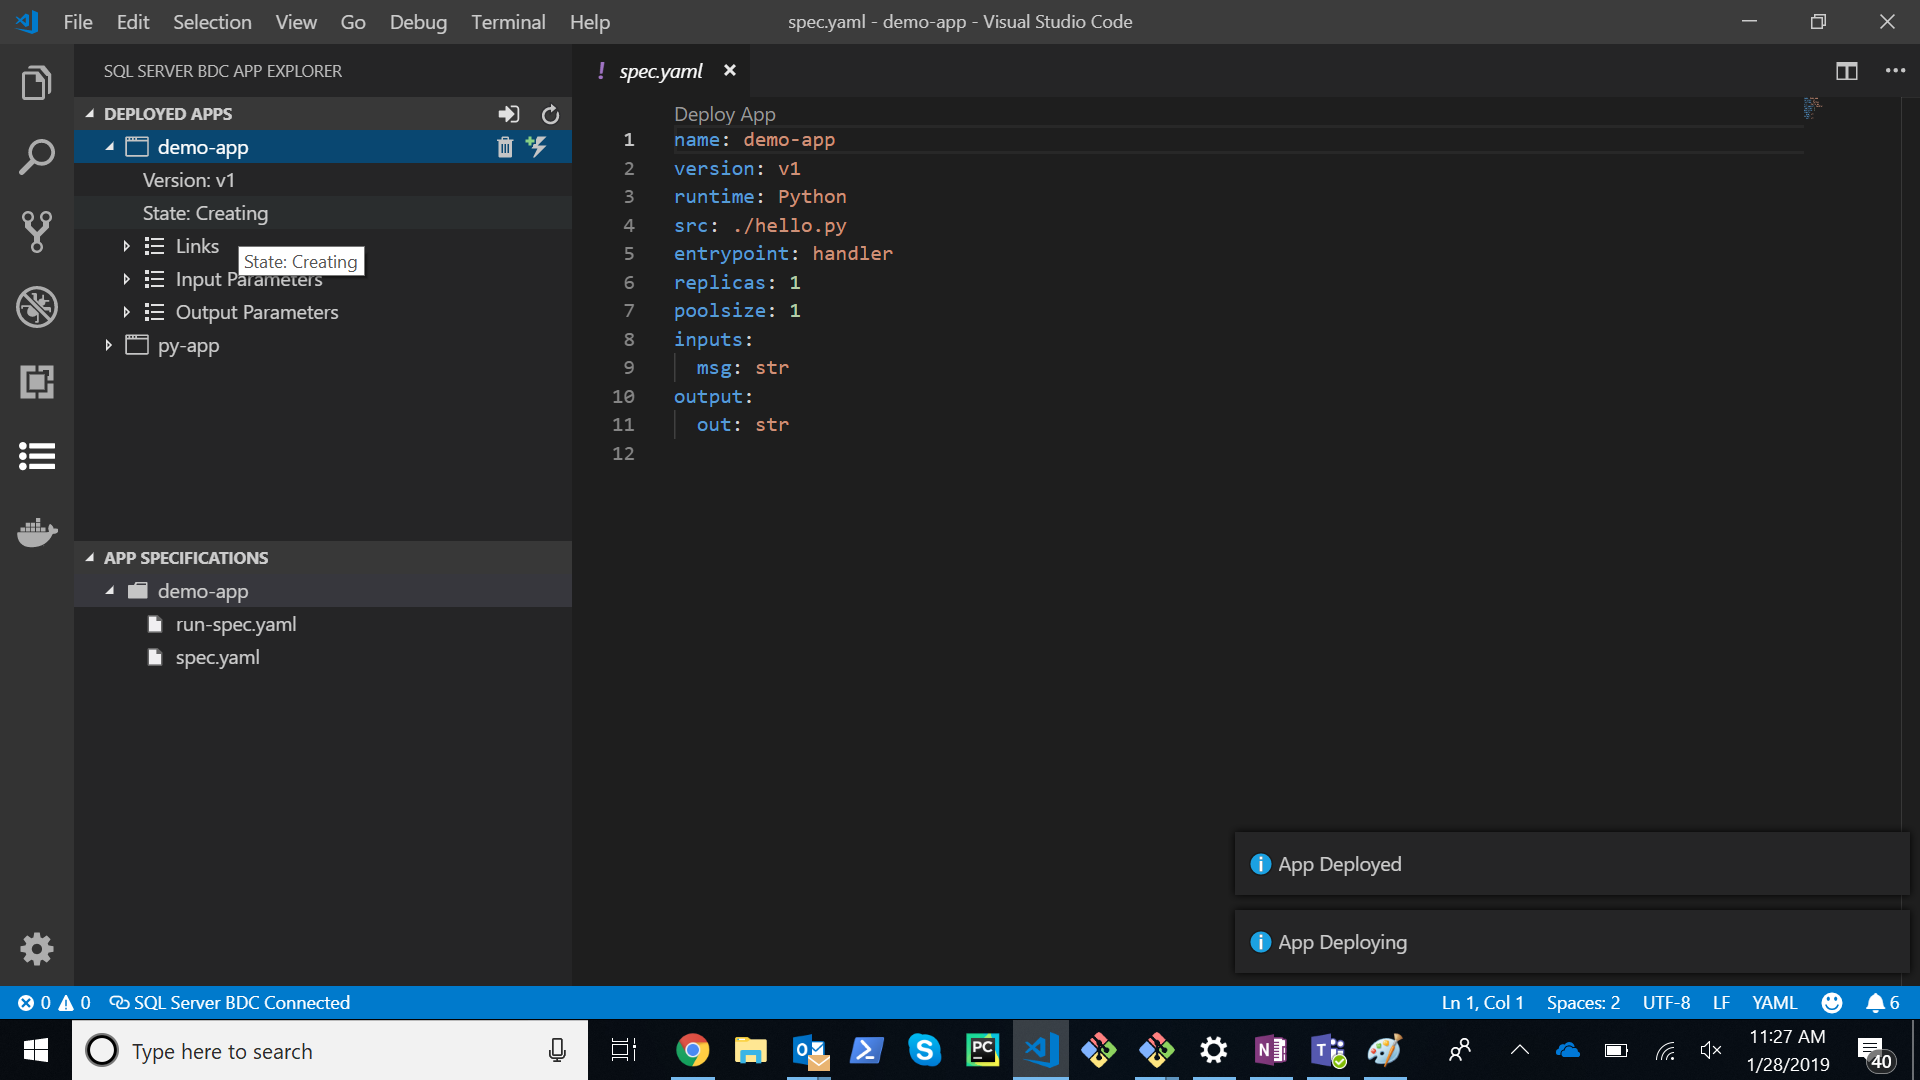
You may instantly deploy this App through the code lens Deploy App in the spec.yaml or you may press the lightning folder button next to the spec.yaml file in the App Specifications menu. The extension will zip up all files in the directory where your spec.yaml is located and deploy your app to the cluster. Please ensure that all of your app files are in the same directory as your spec.yaml. The spec.yaml must be at the root level of your app source code directory.
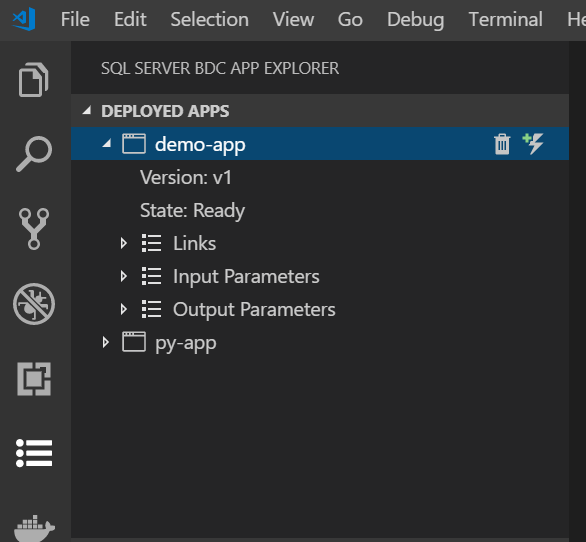
You will be notified when the app is ready for consumption based on the state of the app in the sidebar:
From the side pane, you will be able to see the following available to you:
You may view all apps you have deployed in the side bar with the following information:
- state
- version
- input parameters
- output parameters
- links
- swagger
- details
If you click Links, you will see that you can access the swagger.json of your deployed app, so that you may write your own clients which call your app:
App Run
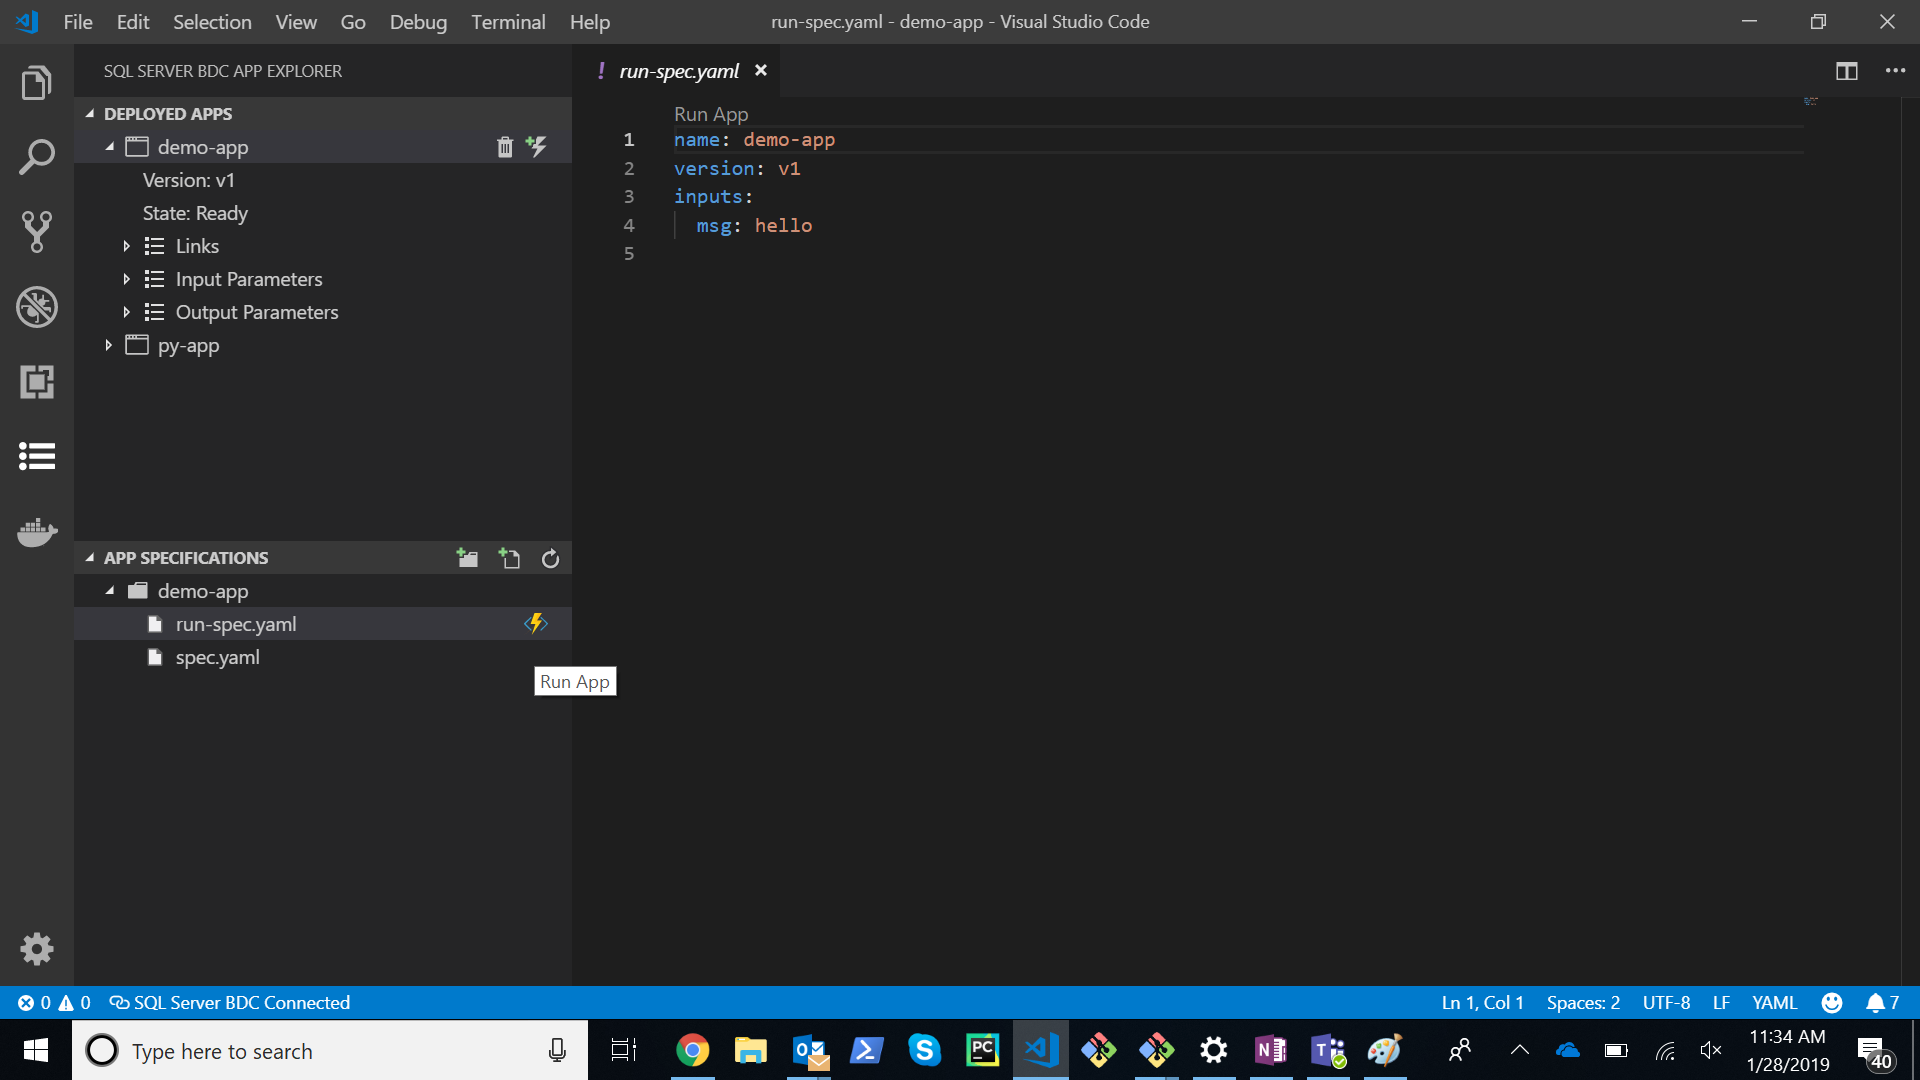
Once the app is ready, you may call the app with the run-spec.yaml that was given as part of the app-template:
Here you may specify any string you'd like in place of hello and then again run it through the codelens link or the lightning button in the side bar next to the run-spec.yaml. If you do not have a run-spec for whatever reason, you may always generate one from the deployed app in the cluster:
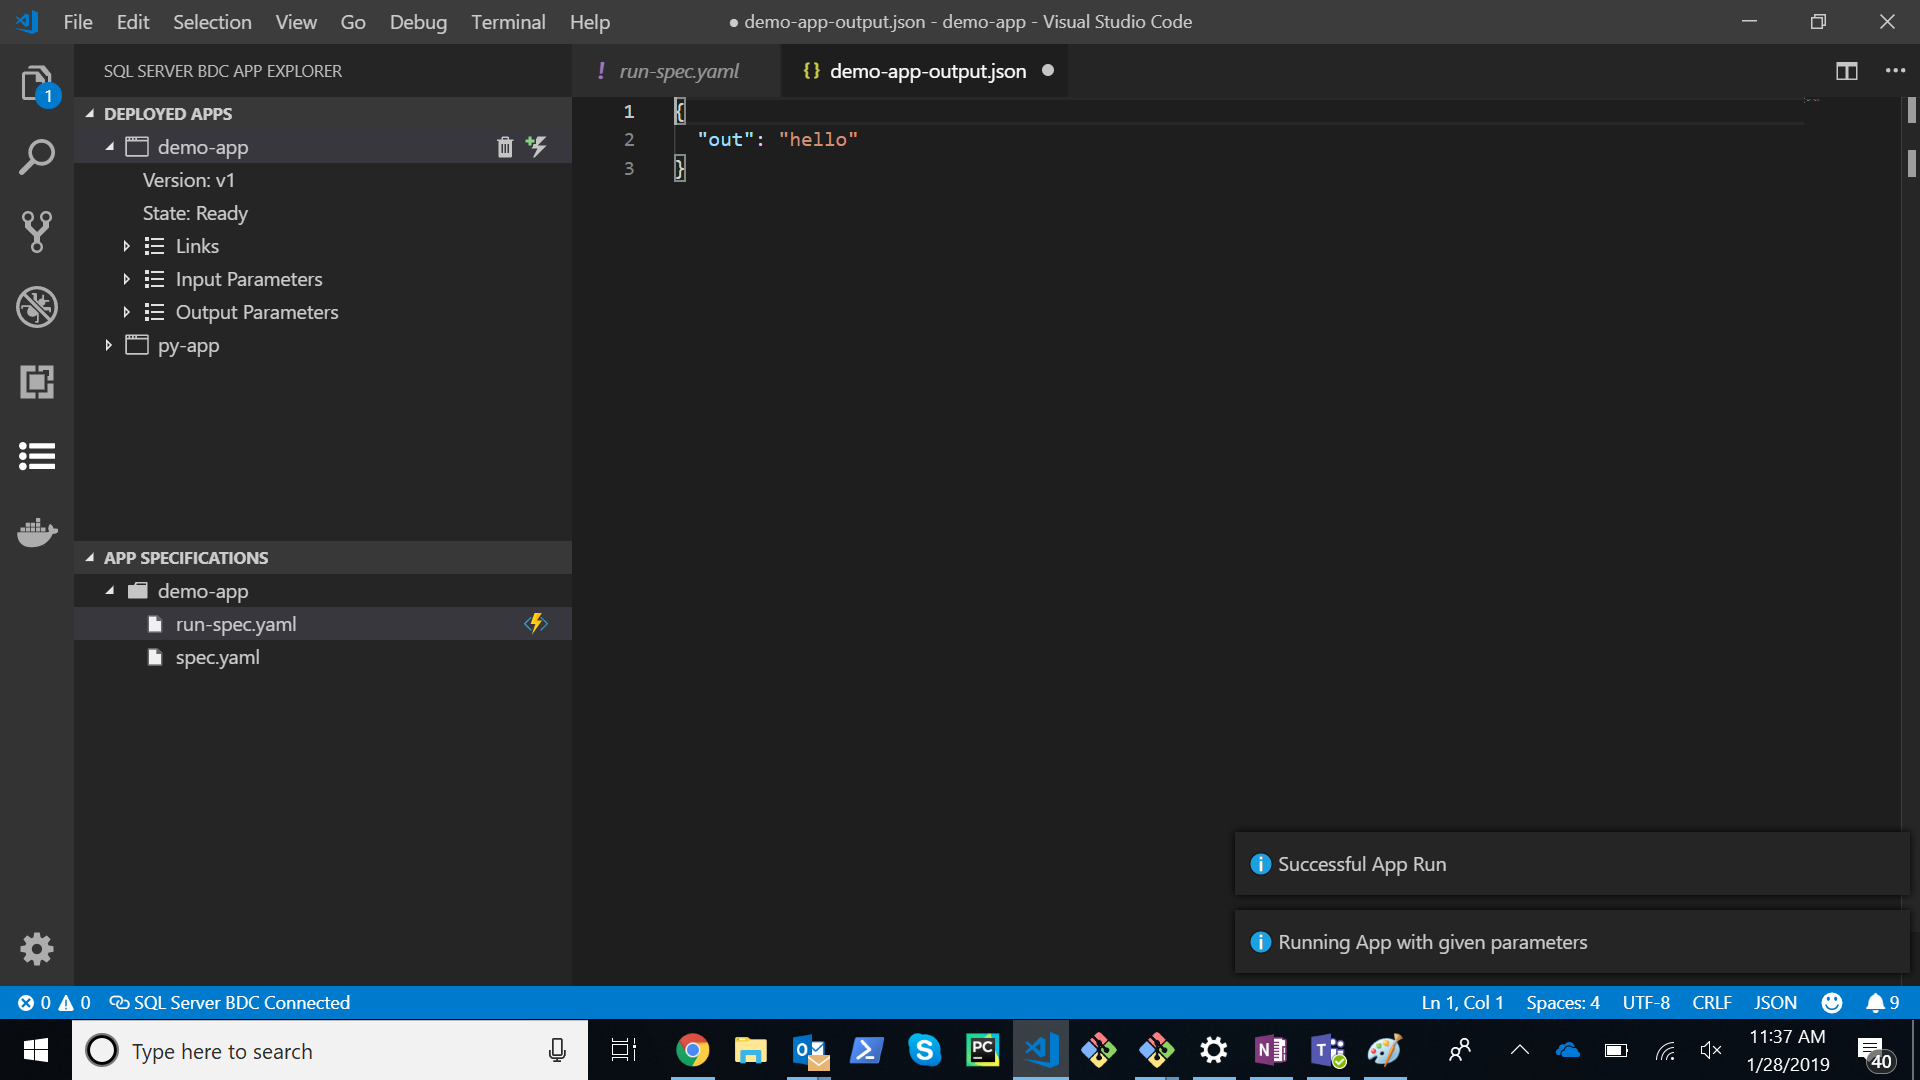
Once you have one and have edited it to your satisfaction, run it, and you will be given the appropriate feedback when the app has finished running:
As you can see from above, the output is given in a temporary .json file in your workspace. If you would like to keep this output, feel free to save it, otherwise, it will be deleted on closing. If your app has no output to print to a file, you will only get the Successful App Run notification at the bottom. If you did not have a successful run, you will receive an appropriate error message that will help you determine what is wrong.
When running an app, there are a variety of ways to pass parameters:
You may specify all inputs required through a .json, i.e.
inputs: ./example.json
When calling a deployed app, if any input parameters are innate to the app or user specified and that given input parameter is anything other than a primitive, such as an Array, Vector, Dataframe, complex JSON, etc. you may specify that directly in line when calling the app, i.e.
- Vector
inputs:x: [1, 2, 3]
- Matrix
inputs:x: [[A,B,C],[1,2,3]]
- Object
inputs:x: {A: 1, B: 2, C: 3}
Or you may also give a string as a relative or absolute file path to a .txt, .json, or .csv that gives the required input in the format that your app requires. The file parsing is based on Node.js Path library, where a file path is defined as a string that contains a / or \ character.
If the input parameter is not provided as needed, an appropriate error message will be shown with either the incorrect file path if a string file path was given or that parameter was invalid. The responsibility is given to the creator of the app to ensure they understand the parameters they are defining.
If you would like to delete the app for any reason, just click the Trash can button next to the app in the Deployed Apps side pane.
Features
Features include:
-
Authentication with cluster endpoint, username, and password
-
Retrieving an application template from GitHub for deployment of supported runtimes
-
Management of currently open application templates in the user's workspace
-
Deployment of an application through a specification YAML
-
Management of deployed apps within SQL Server Big Data Cluster
You may view all apps you have deployed in the side bar with the following information:
- state
- version
- input parameters
- output parameters
- links
- swagger
- details
From here, you may generate a run spec to consume the app or you may delete the app from the cluster
- Consumption of deployed apps through a run specification YAML
Requirements
Requirements include:
Visual Studio Code
SQL Server Big Data Cluster
Development
For future development:
Clone the code to your machine
Navigate to the root of the project and run:
npm install
Open the project root in Visual Studio Code
code .
Press F5 to debug
You can set breakpoints anywhere in the project
In order to run the unit tests, change the debug target in Visual Studio Code from Extension to Unit Tests
In order to run the integration tests, please have a working cluster and set the endpoint and credentials in the test/integration/env.ts file and then change the debug target in Visual Studio Code from Extension to Integration Tests
Architecture
VS Code
All VS Code Extensions have an extension.ts file at the root of the src directory.
The primary objective of this file is to run the activate() function when the extension is initialized. The activate function proceeds to create all views, services, and controllers necessary and then registers the respective VS Code components to the methods from the controllers. In addition, all VS Code registrations are pushed on to a disposable array that is disposed of on deactivation of the extension.
The extension itself is defined within the package.json, which is known as the manifest file for VS Code extensions. This is where the structure of the UI is defined, i.e. what views and commands are being added in which menus.
Controllers
There are two primary controllers for the app:
- src/controllers/configController.ts
- This controller is in charge of getting the configuration object from the configService.ts if it exists, otherwise prompting the user for credentials through the configInput.ts view, and using it to login to the cluster through the tokenService.ts
- src/controllers/appController.ts
- This controller is in charge of managing the app life cycle: getting a template or deployment spec, deployment of an app, running an app, and deleting an app.
Views
For this project, views are defined as UI logic specific to VS Code and they are located in the src/views directory. There are a few primary types of views:
- Tree Views
- appTree.ts
- Contains all of the view logic for representing the
Deployed Appstree on the side pane
- Contains all of the view logic for representing the
- specTree.ts
- Contains all of the view logic for representing
App Specificationstree on the side pane
- Contains all of the view logic for representing
- appTree.ts
- Input Views
All of these are based on multiStepInput.ts
- configInput.ts
- View logic for configuration user input
- specInput.ts
- View logic for app template and deployment spec user input
- runSpecInput.ts
- View logic for run spec user input
- configInput.ts
- Code Lens
- specCodeLensProvider.ts
- View logic for the injected codelens to
Deploy ApporRun App
- View logic for the injected codelens to
- specCodeLensProvider.ts
- Notifications
- notificationProvider.ts
- View logic for displaying notifications to user
- notificationProvider.ts
Services
For this project, services are defined as all of the business logic for making HTTP requests and File System manipulation. There are 4 services:
- tokenService.ts
- Contains all logic for retrieving the JWT from the cluster through HTTP requests
- configService.ts
- Contains all logic for storing configuration in memory and to save host and username to ./sqlbdc in the user profile
- specService.ts
- Contains all logic for file system manipulation while dealing with the specification yamls for deployment and running of apps
- appService.ts
- Contains all logic for making HTTP requests concerning apps in the cluster
Constants
Messaging strings, runtime types, storage location, etc. can all be found as hard coded values in this directory so that there is a consistent place to change any of these values in the future to avoid potential bugs.
Models
All interface contracts are defined here that are used by the services and controllers as well as a few object implementations of these interfaces where it was valuable
Util
All miscellaneous helper methods are located here
Known Issues
TBD
Release Notes
First release
1.0.0
Initial release of App Deploy Visual Studio Code Extension
