Bumps [webpack](https://github.com/webpack/webpack) from 5.74.0 to 5.76.0. - [Release notes](https://github.com/webpack/webpack/releases) - [Commits](https://github.com/webpack/webpack/compare/v5.74.0...v5.76.0) --- updated-dependencies: - dependency-name: webpack dependency-type: direct:development ... Signed-off-by: dependabot[bot] <support@github.com> Co-authored-by: dependabot[bot] <49699333+dependabot[bot]@users.noreply.github.com> |
||
|---|---|---|
| .github/workflows | ||
| configs | ||
| images | ||
| marketplace | ||
| src | ||
| static | ||
| .editorconfig | ||
| .eslintrc.js | ||
| .gitignore | ||
| CODE_OF_CONDUCT.md | ||
| LICENSE | ||
| README.md | ||
| SECURITY.md | ||
| azure-devops-extension.json | ||
| azure-pipelines.yml | ||
| package-lock.json | ||
| package.json | ||
| prettier.config.js | ||
| tsconfig.json | ||
| webpack.config.js | ||
| webpack.dev.config.js | ||
README.md
Cascading Picklists Extension
This extension can be found in the Azure DevOps Marketplace.
Note that the extension is only supported on Azure DevOps Service. Is it is currently not supported on-prem yet due to a missing API.
Cascading Picklists
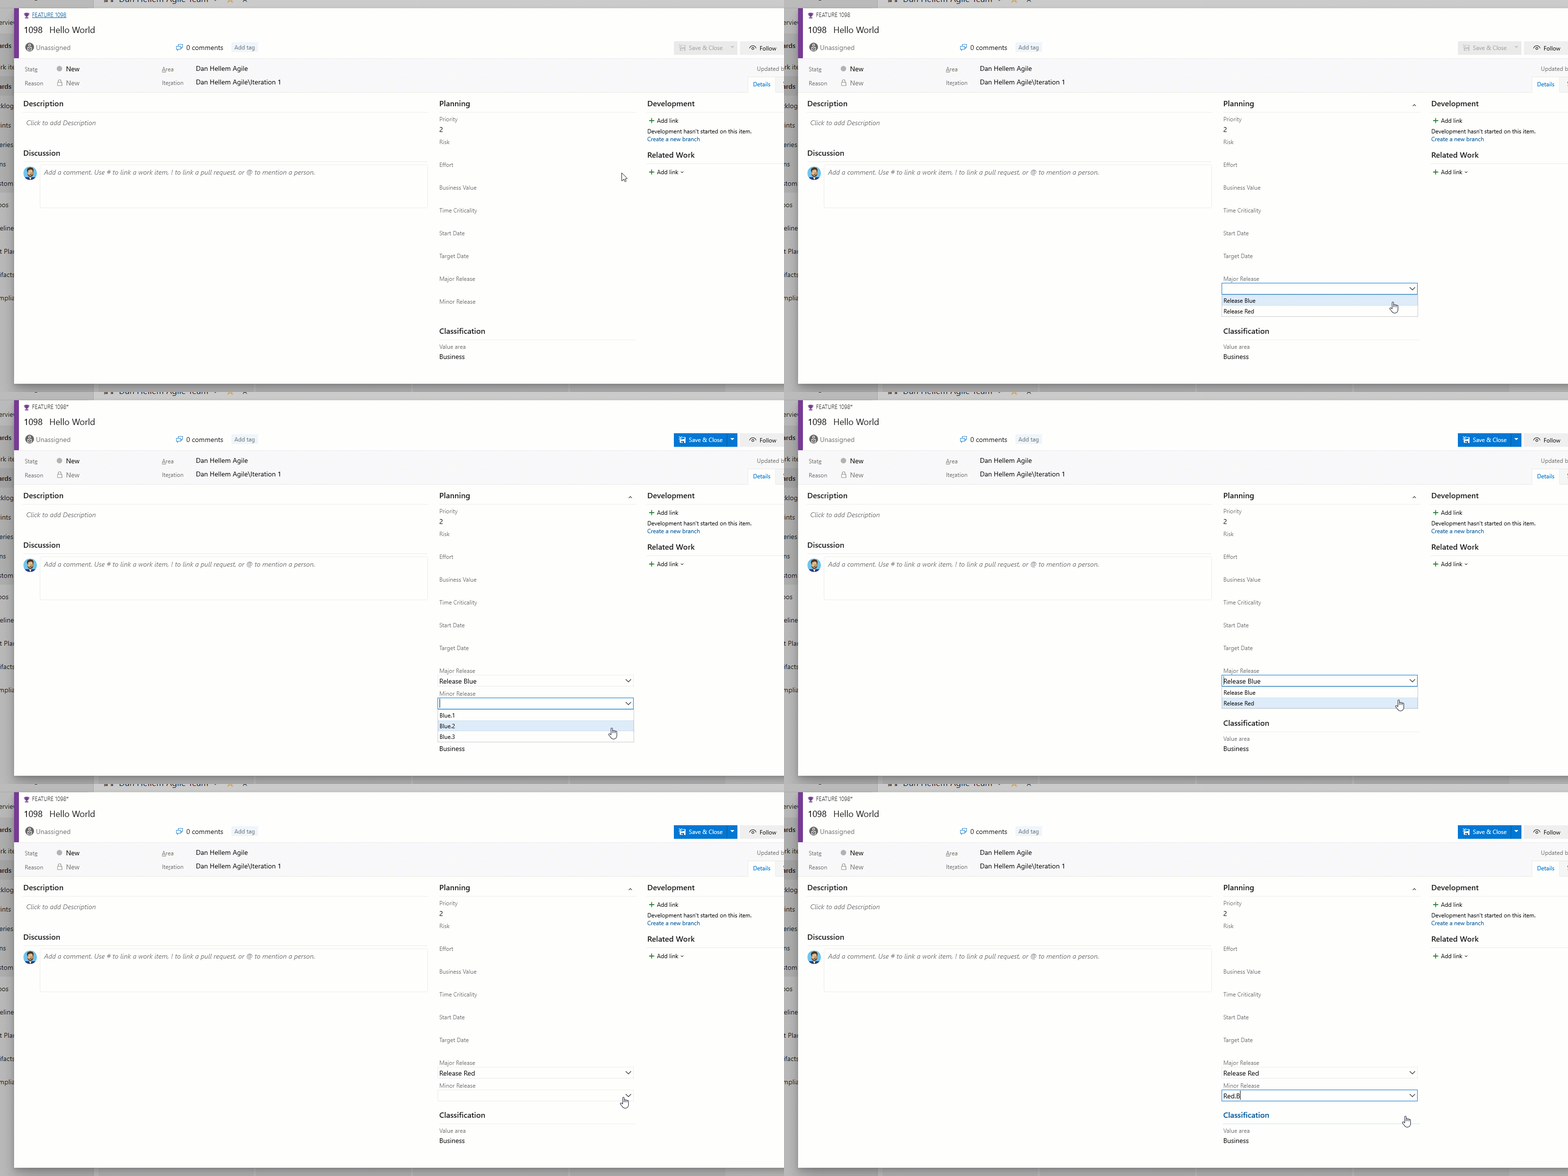
This extension uses the ms.vss-work-web.work-item-form contribution point that enables you to build a cascading picklist on the work item form. Cascading picklists are made up of two seperate fields. The parent field and a child field. The parent picklist will contain a list of values, that when a value is selected, will display the values in the child list.
Create a picklist
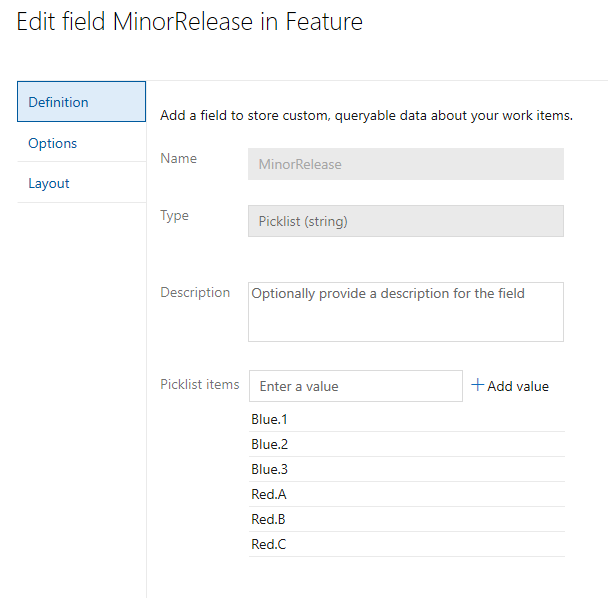
First, create a picklist of parent values. Second, create a picklist of child values. This child picklist will contain all possible values. We will configure how those values get displayed in the extension configuration.
Configure
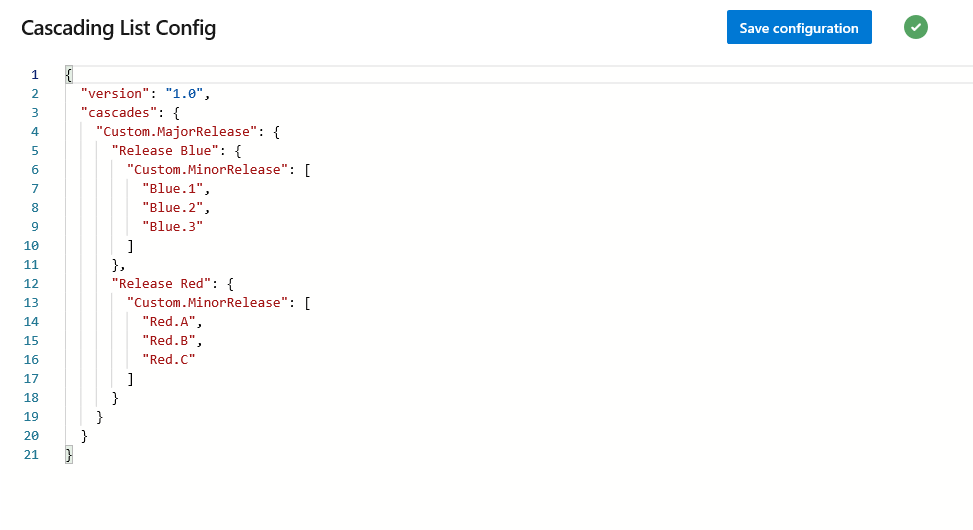
Once both picklists have been created and configured, you can configure what child picklist values will be displayed. You do this by going to the "Cascading Lists" Hub in project settings. From here, configure the value for the parent picklist, so that when selected, the child values will be displayed.
Config example:
{
  "version": 1,
  "cascades": {
      "Custom.MajorRelease": {
          "Release Blue": {
              "Custom.MinorRelease": [
                  "Blue.1",
                  "Blue.2",
                  "Blue.3"
              ]
          },
          "Release Red": {
              "Custom.MinorRelease": [
                  "Red.A",
                  "Red.B",
                  "Red.C"
              ]
          }
      }
  }
}
Tips
-
You must know the refname of the custom picklist fields. You can use List Fields REST API if you need help finding the value.
-
The values setup in the picklist and the values in the configuration must be an exact match. There is no validation to check or correct spelling mistakes in the values.
Get started with Extensions
Building and testing the extension requires following.
npm i -g tfx-cli
Install dev prerequisites
npm install
Create vsix to deploy on test environment
npm run build
Run the extension server locally
Execute following commands in two separate Command Prompts. Denote that in order to test extenstion locally, you need to have certificate and key in the project root called private.crt and private.key.
npm run watch
npm run serve-dev
Publish the dev extension to marketplace
Follow the instructions here:
Package, publish, unpublish, and install Azure DevOps extensions
Contributing
This project welcomes contributions and suggestions. Most contributions require you to agree to a Contributor License Agreement (CLA) declaring that you have the right to, and actually do, grant us the rights to use your contribution. For details, visit https://cla.microsoft.com.
When you submit a pull request, a CLA-bot will automatically determine whether you need to provide a CLA and decorate the PR appropriately (e.g., label, comment). Simply follow the instructions provided by the bot. You will only need to do this once across all repos using our CLA.
This project has adopted the Microsoft Open Source Code of Conduct. For more information see the Code of Conduct FAQ or contact opencode@microsoft.com with any additional questions or comments.


