Содержание
- Scenes
- Lobbies and Rooms
- Sharing Invites
- Receiving Invites
- User List
- Chat
- Notifications
- Name & Avatar
- Entering a Room
- Entering on a Mobile VR Headset
- In-Room Experience
- Moving Around
- Muting
- Adding video, audio, 3D models and images
- Moving Objects
- Menus
- Pinning
- Blocking
- Using Chat
- Using the Camera
- Using the Pen
- Sharing Your Screen or Phone/Web Cam
- Controls
Scenes
Scene Browser
Hubs currently has five built-in scenes for you to choose from. If you're an advanced user, you can also create your own custom scene, either using Spoke, our scene creation tool, or the "options" dialog on the scene browser.
Lobbies and Rooms
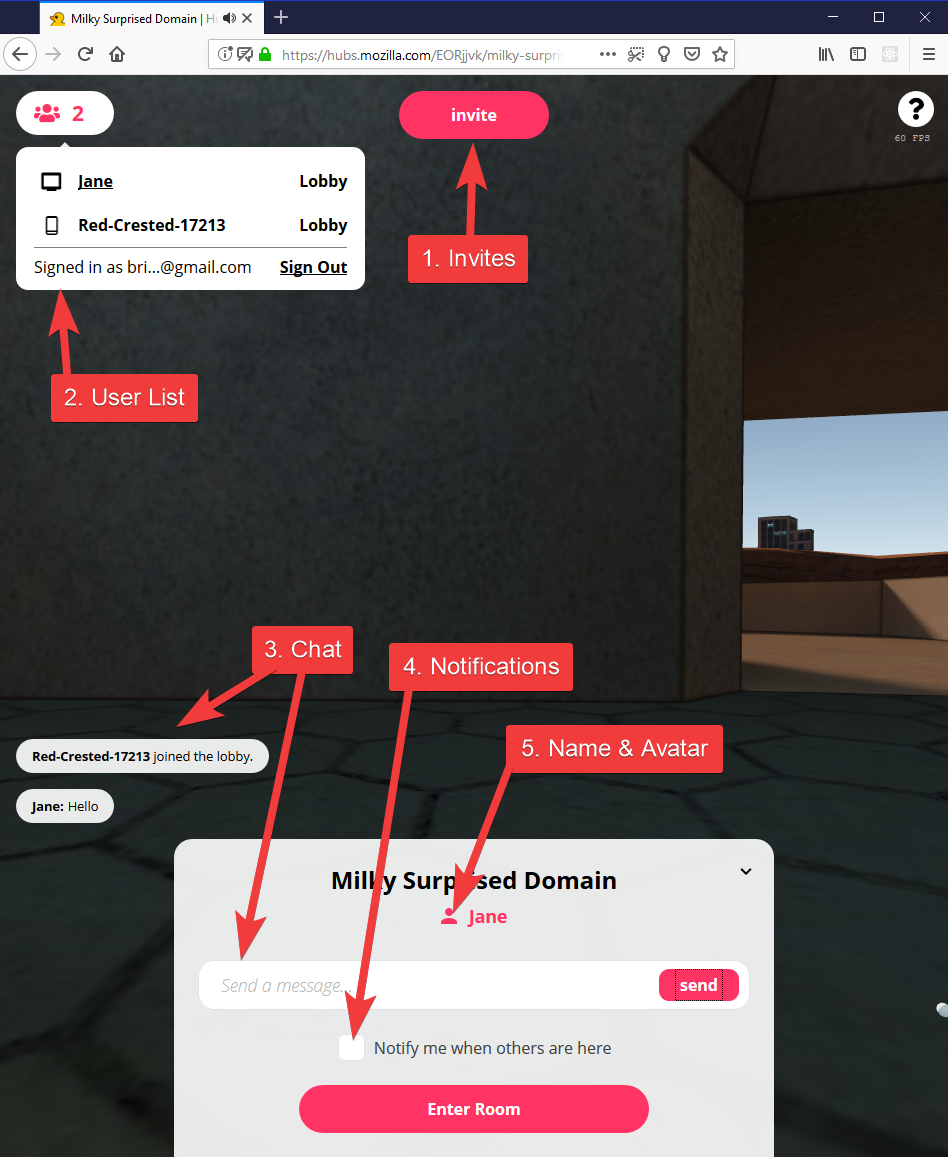
Once you create a room, you'll be placed in the room's lobby. The lobby allows you to preview the room and any users who might already be in the room.
Sharing Invites
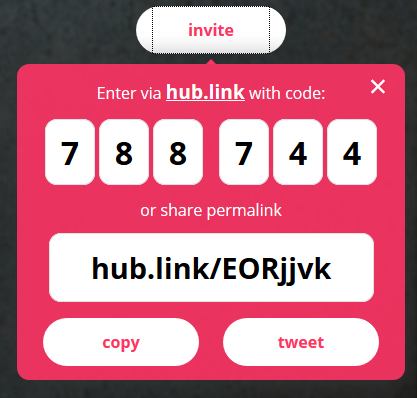
The invite dialog gives you the information you need to share with others for them to join you in the room. You can use the numeric code to share a link verbally, share the current room URL or the shortened hub.link URL.
Receiving Invites
If you're given a numeric code, simply visit hub.link and type the code in to go directly to the room.
User List
The user list tells you how many users are present, their names, device types and whether they've entered the room or are still in the lobby.
Chat
You can use text chat to communicate with users in the room from both the lobby and after you've entered the room.
Notifications
A checkbox on the lobby page allows you to sign up for notifications that alert you when another user has entered the room. You can sign up for notifications on your phone or desktop. You do not need to remain in the room to receive notifications.
Name & Avatar
Use this dialog to choose a name and avatar. Advanced users can also specify a custom avatar URL.
Entering a Room
When you're ready to enter a room, you'll be asked to pick a name and avatar, if you haven't already, choose an appropriate device, then set-up and test your audio.
Entering on a Mobile VR Headset
If you've visited a Hubs room on a desktop or smartphone, you can use the "Mobile Headset" device option to easily enter a room from your desktop or phone to a standalone headset, like the Oculus Go or Mirage Solo or from a desktop to smartphone-based VR device, like the Google Daydream View or Samsung Gear VR. Simply click the "Mobile Headset" device option and then follow the instructions in your VR Headset.
In-Room Experience
Once you've entered a room, you can move around, speak to other users in the room, create and manipulate objects, take photos, share your screen or camera, use the text chat, and draw with a pen. See the Hubs Controls page for more details about your particular device.
Moving Around
See the Hubs Controls page for details about your device.
Fly Mode
Use the "/fly" command in chat to toggle fly mode.
Growing and Shrinking
Use the "/grow" and "/shrink" commands in chat to change the size of your avatar.
Muting
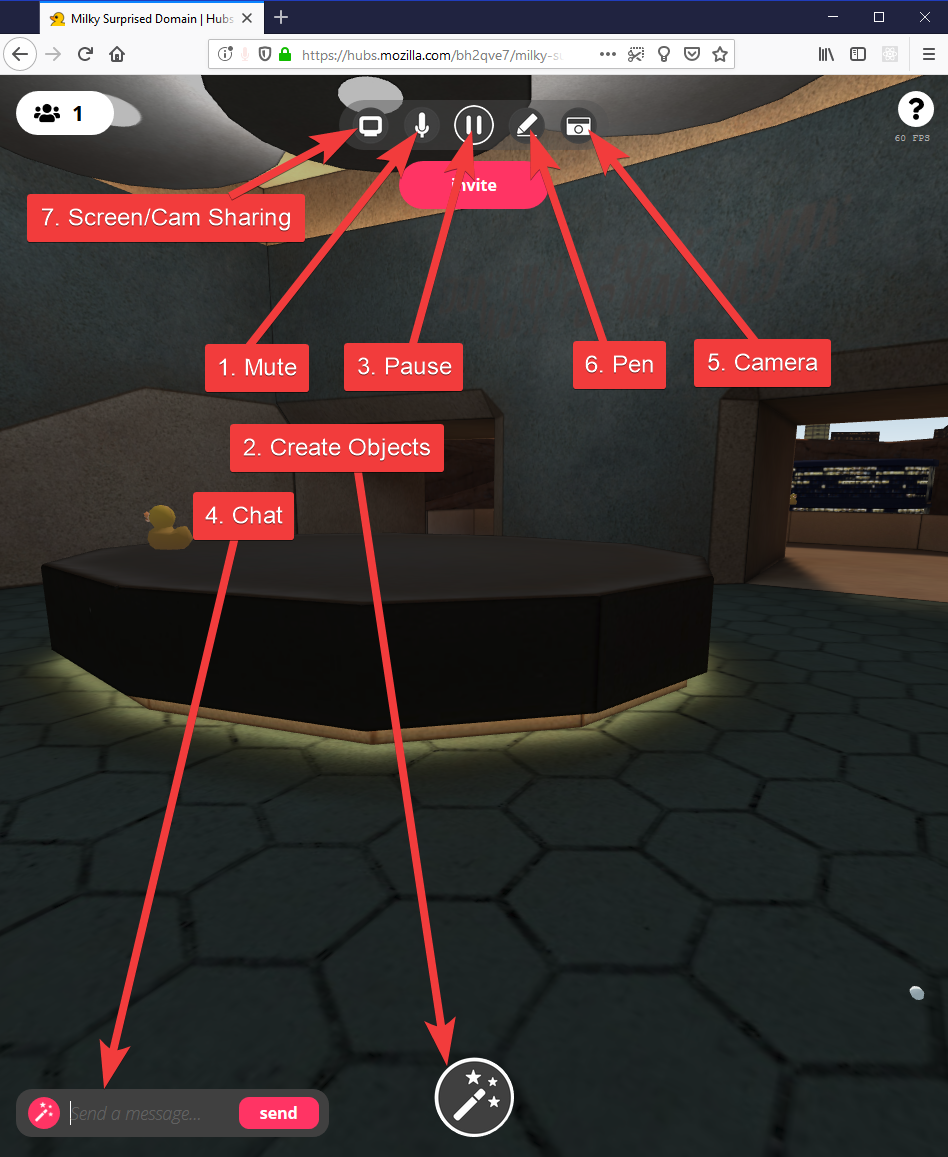
Click on the microphone icon to mute yourself.
Adding video, audio, 3D models and images
You can add a variety of objects to Hubs rooms. We support 3D models, images, videos and PDFs from almost anywhere on the web including SketchFab, Google Poly, SoundCloud, YouTube, Twitter, Twitch, Crunchyroll, and more. You can add media with the "Create Object" button or by pasting or dragging and dropping a URL onto the room.
Moving Objects
You can move, rotate and scale objects freely in the room.
Menus
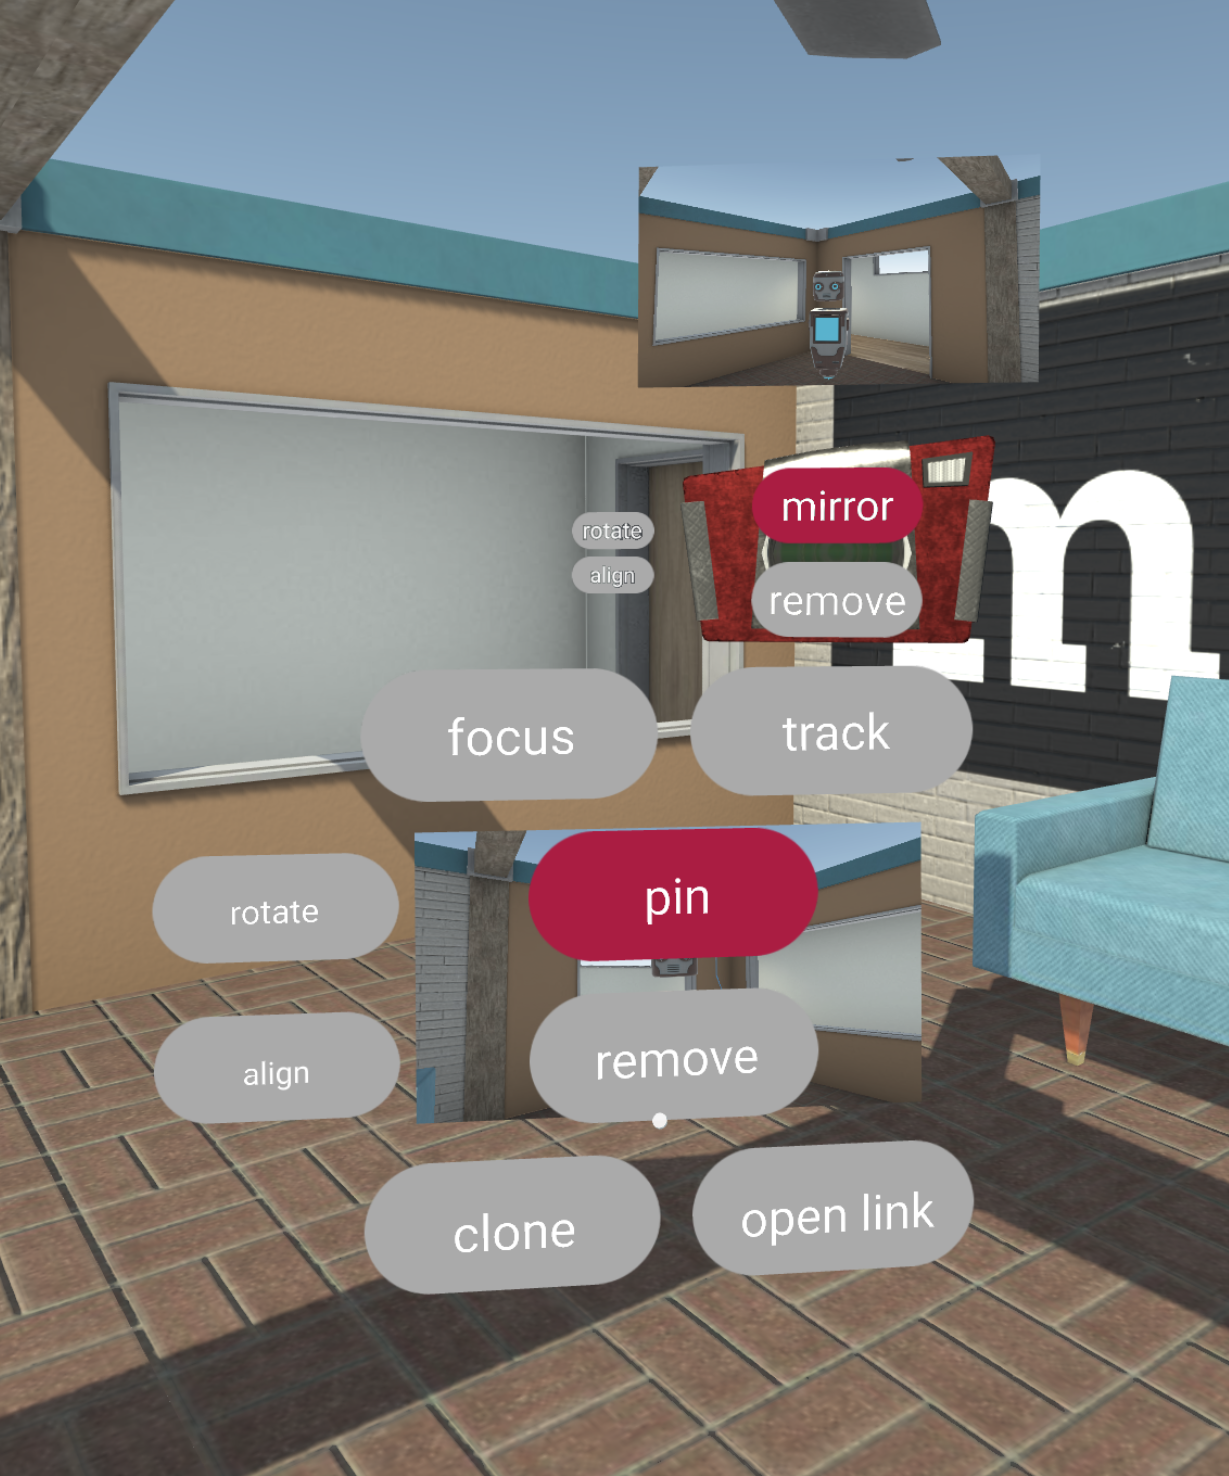
The pause button toggles menus on objects and avatars that let you perform various actions such as blocking users and removing, rotating and pinning objects.
Pinning
By default, objects disappear when their owners (the person that last touched them) leaves the room. If you would like an object to stay in the room permanently, you can click on the "pin" button in object menus.
Blocking
Click on the "block" button in the avatar menu to block a user. When you block a user, they disappear from your view and you stop receiving their audio. Other users can still see users that you choose to block.
Using Chat
The chat lets you message users who are in the room and in the lobby. You can also use the chat to create text objects in the room; Type a message into chat and click on the small "Create Object" button to the left. The chat also lets you run special commands; Type "/help" to see a list of them.
Using the Camera
The camera lets you take photos of the room and adds those photos to the room as image objects. When you take a photo, it also appears in chat, where you can copy the URL or tweet it with the share button.
Mirror Mode
You can toggle the camera into "mirror" mode. This changes your view on desktop to display what the camera is seeing.
Focus and Track Mode
You can also "focus" the camera or toggle it into "track" mode by clicking on respective buttons on an object. The camera will point towards or follow the object when it is moved.
Using the Pen
The pen lets you draw in 3D space. You can also change the pen's size and color and undo strokes.
Sharing Your Screen or Phone/Web Cam
You can share your desktop screen, webcam or phone camera with users in the room. The shared media will appear like a video in the room. You can remove the shared media in the object's menu.
Controls
See the Hubs Controls page for details about your device.


