Страница:
Local Tutorial Outputs to disk
Страницы
Arm Parameters
Azure deployment
Cloud Deployment On Linux
Cloud Simulator
Cloud deployment
Configuring the Arm template
Create new metric
Creating your first pipeline in 5 minutes!
Data Accelerator with Databricks
Data Accelerator
Data Accumulator
Diagnose issues using Telemetry
FAQ
Find Applications For Your Environment
Home
Inviting others and RBAC
Live query
Local Cloud Debugging
Local Tutorial Add an Alert
Local Tutorial Adding SQL to your flow and outputs to Metrics dashboard
Local Tutorial Advanced Aggregate alerts
Local Tutorial Creating your first Flow in local mode
Local Tutorial Custom schema
Local Tutorial Debugging using Spark logs
Local Tutorial Extending with UDF UDAF custom code
Local Tutorial Outputs to disk
Local Tutorial Reference data
Local Tutorial Scaling the docker host
Local Tutorial Tag Aggregate to metrics
Local Tutorial Tag Rules output to local file
Local create metric
Local mode with Docker
Local running sample
Output data to Azure SQL Database
Run Data Accelerator Flows on Databricks
Scale
Schedule batch job
Set up aggregate alert
Set up new outputs
Set up simple alert
Spark logs
Tagged data flowing to CosmosDB
Tagging aggregate rules
Tagging simple rules
Tutorials
Upgrade Existing Data Accelerator Environment to v1.1
Upgrade Existing Data Accelerator Environment to v1.2
Use Input in different tenant
Windowing functions
functions
readme
reference data
sql query
12
Local Tutorial Outputs to disk
Vijay Upadya редактировал(а) эту страницу 2019-10-03 14:51:08 -07:00
The output tab let's you configure outputs to route data to. Since we are in local mode, we will see how to output the data to the local file system. In the cloud mode (i.e. once Data Accelerator is deployed to Azure), you would be able to output data to various other sinks such as Azure blobs, CosmosDB, etc.
In this tutorial, you'll learn to:
- Add an output location
- Write data to this output location
Setting up an output
- Open your Flow
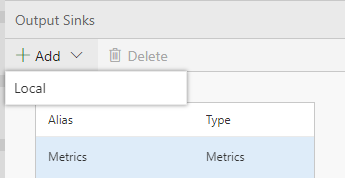
- Open the Output Tab to configure an output and select Add 'Local'
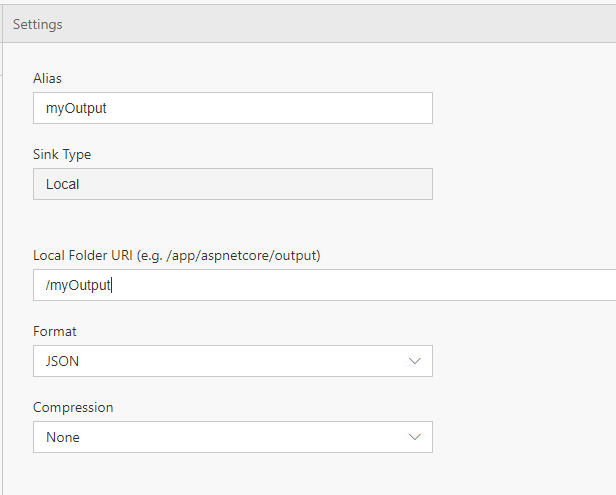
- For Alias, input "myOutput"; this is how the output will be referred to throughout the Flow,
- For folder, you can input '/myOutput'; this is the folder data will go to within the docker container
- Format will be JSON
- You can decide to use GZIP compression or none as well
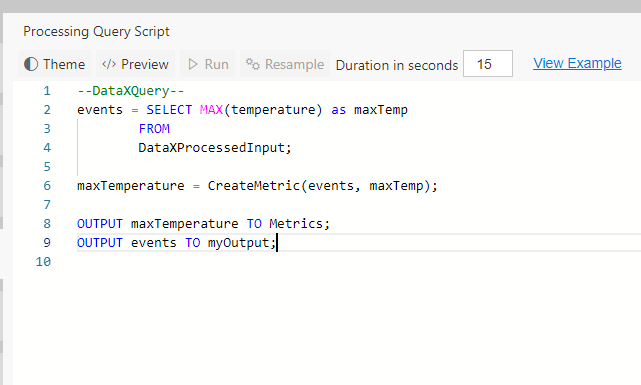
- Go back to the Query tab and input a new OUTPUT statement at the end to output to local filesystem:
--DataXQuery--
events = SELECT MAX(temperature) as maxTemp
	 FROM
	 DataXProcessedInput;

maxTemperature = CreateMetric(events, maxTemp);

OUTPUT maxTemperature TO Metrics;
OUTPUT events TO myOutput;
Query window will look like below:
- Click Deploy.
You have connected the Flow to a new output.
View output within a docker container
You can view files within a container by statrting a bash session inside the container. This is useful to view output in case you have that specified in your flow. You can cd into the folder you specified when adding a local output location, say, Local Folder URI (e.g. /app/aspnetcore/output)
- If you wish to view data from output
docker exec -it dataxlocal /bin/bash - View the contents of a folder
ls - Navigate to the specific output folder you configured. Inside it, you will notice sub folder of the form YYYY/MM/dd/hh/mm/batch-interval (UTC time) and the data is stored inside the time subfolder and contains a single file per output. Example: cd /myOutput/2019/04/23/45/234800
cd <folder name> - View the contents of a file. Example: cat part-0.json
cat <filename>


